
 Pin
Pin
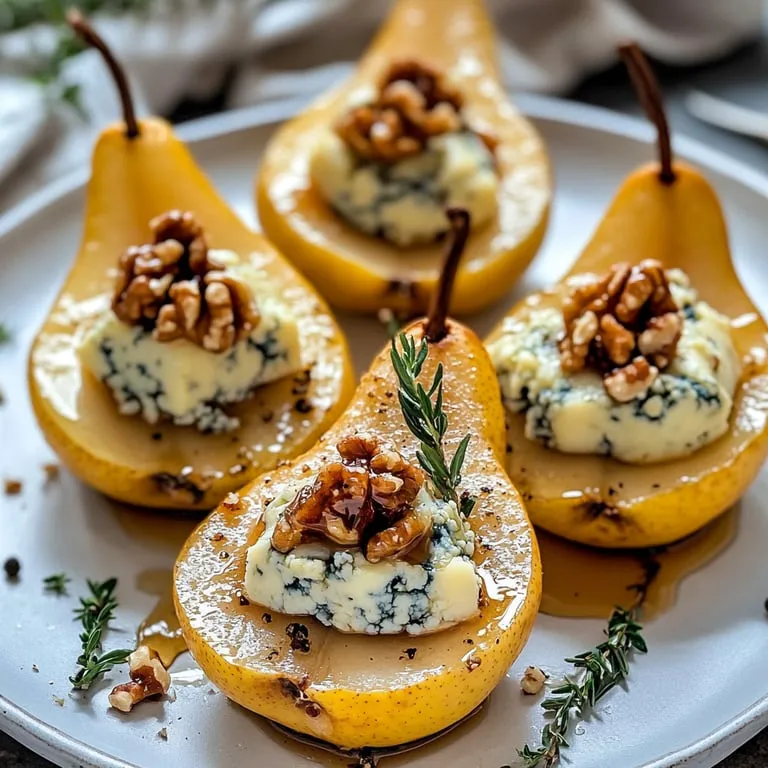
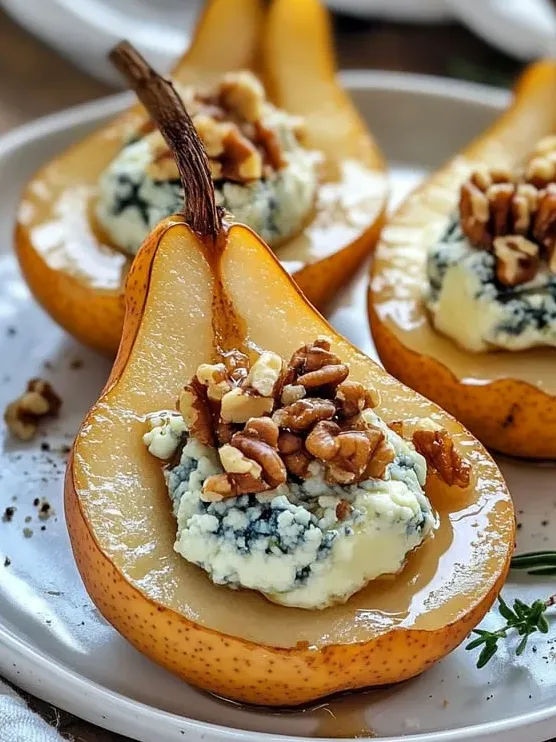
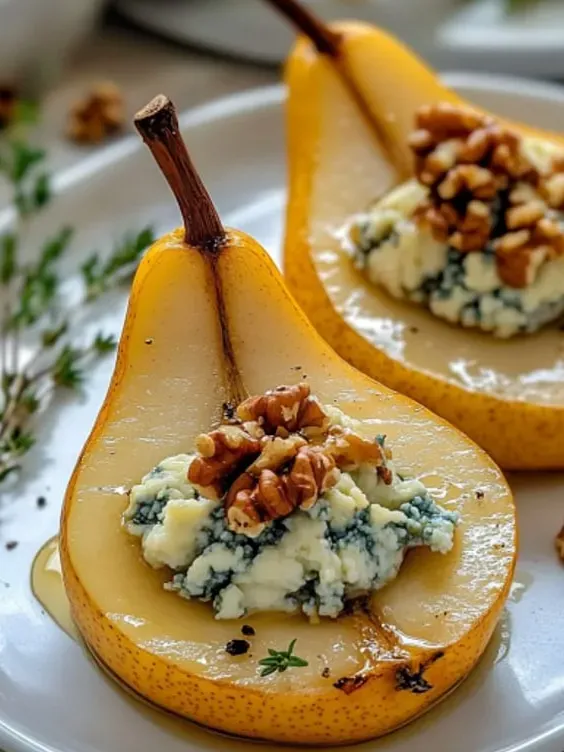
Bold blue cheese, honey, walnuts, and fresh thyme dress up juicy pears in a snack that looks fancy but is a breeze to make. These blue cheese pears bring everyday fruit straight into party territory, and everyone ends up talking about them long after the meal’s over.
I’ve made lots of snacks for get-togethers but this one shocked me—people gobble them up instantly! When I served it last book club night, folks said it was the fanciest thing they'd ever eaten there.
Irresistible Ingredients
- Ripe pears: For best results, grab pears that are still slightly firm—that keeps them from getting mushy. Avoid anything too soft or ripe.
- Fresh thyme: Snappy, green sprigs add a fresh herbal pop on top at the end.
- Balsamic vinegar: Cuts through the richness and pulls the flavors together. Use a thick, sticky vinegar if you've got one.
- Honey: Bring in floral sweetness and balance—local honey tastes extra special but any will do.
- Toasted walnuts: Crunchy and rich, good walnuts make all the difference. Toast plain nuts in a skillet for the best taste.
- Ground black pepper: Sprinkle on for a little gentle heat and a nice aroma—freshly ground is the way to go.
- Blue cheese: Make sure it's crumbled so it melts in—Danish and Roquefort are both creamy, mild picks that work great.
Simple How-To Guide
- Add the Final Touches and Dish Up
- Gently take the pears out and top each with extra honey. Pop a sprig of thyme on each. Wait a couple of minutes then hand them out while they’re still gooey and warm.
- Bake the Stuffed Pears
- Splash each stuffed pear with some balsamic, then shake a little black pepper on top. Slide your pan into the oven and bake for twenty to twenty-five minutes until the pears are soft but still hold their shape and the cheese is melty.
- Stuff to Fill
- Scoop hearty spoonfuls of the cheese mix into each pear’s hollow. Press gently so it all stays in as it bakes.
- Whip Up the Cheese Mixture
- Mix blue cheese crumbles, walnuts, and honey together in a small bowl so everything’s nicely coated. Go easy so the cheese stays chunky.
- Slice and Scoop Out the Pears
- Cut pears in half the long way, then use a spoon or melon baller to scoop out the centers and seeds. Line up your halves, cut side up, on the baking tray so they’re stable.
- Get the Oven Ready
- Preheat the oven to one ninety Celsius. Grab your baking sheet and set it aside.
 Pin
Pin
The winner for me is creamy Roquefort in this dish. The sharp cheese and warm, soft pears always take me back to family holidays where my aunt would snip fresh thyme from her yard to sprinkle on top and the name alone made everything feel special.
Keeping Extras Fresh
Pears like this will keep for two days chilled in the fridge. Store them in a single layer in an airtight box. To reheat, just pop them in a low oven with no lid—you’ll bring back the melty top and lovely texture.
Easy Swaps
If blue cheese isn’t for everyone, try swapping in goat cheese or some feta instead for something milder. Pecans or almonds (toasted) are great if you’re out of walnuts. Want to go plant-based? Use vegan blue cheese and a bit of maple syrup in place of honey.
Serving Ideas
These make a classy appetizer for cozy fall or winter dinners, or just slice them smaller for sharing at a party. Put them on dark plates to dress things up. They’re extra nice with chilled sparkling wine or something sweet and dessert-y.
 Pin
Pin
Timeless Table Flair
Pears and blue cheese have been best friends on European tables forever. Adding honey and nuts is a trick from old school French and Italian cooks—it's a simple way to show off what fall brings, even with just a few things from your pantry.
FAQs About the Recipe
- → What pears will hold up best?
Bosc or Anjou are great picks since they're sweet and won't fall apart in the oven. Grab pears that are ripe but still firm.
- → Not a blue cheese fan? What else works?
If you'd rather something smoother, swap in goat cheese or gorgonzola. Use whatever suits your taste.
- → Can I fix these ahead of time?
Yep, go ahead and fill the pears early. Store them in the fridge, then bake just before you plan to serve so they're fresh.
- → Any ideas for a vegan version?
Stuff with your favorite plant-based cheese and use agave instead of honey. That's it!
- → Serve these straight from the oven or cool?
They're best while still warm, but letting them cool to room temp is fine if you need to prep ahead.