
 Pin
Pin
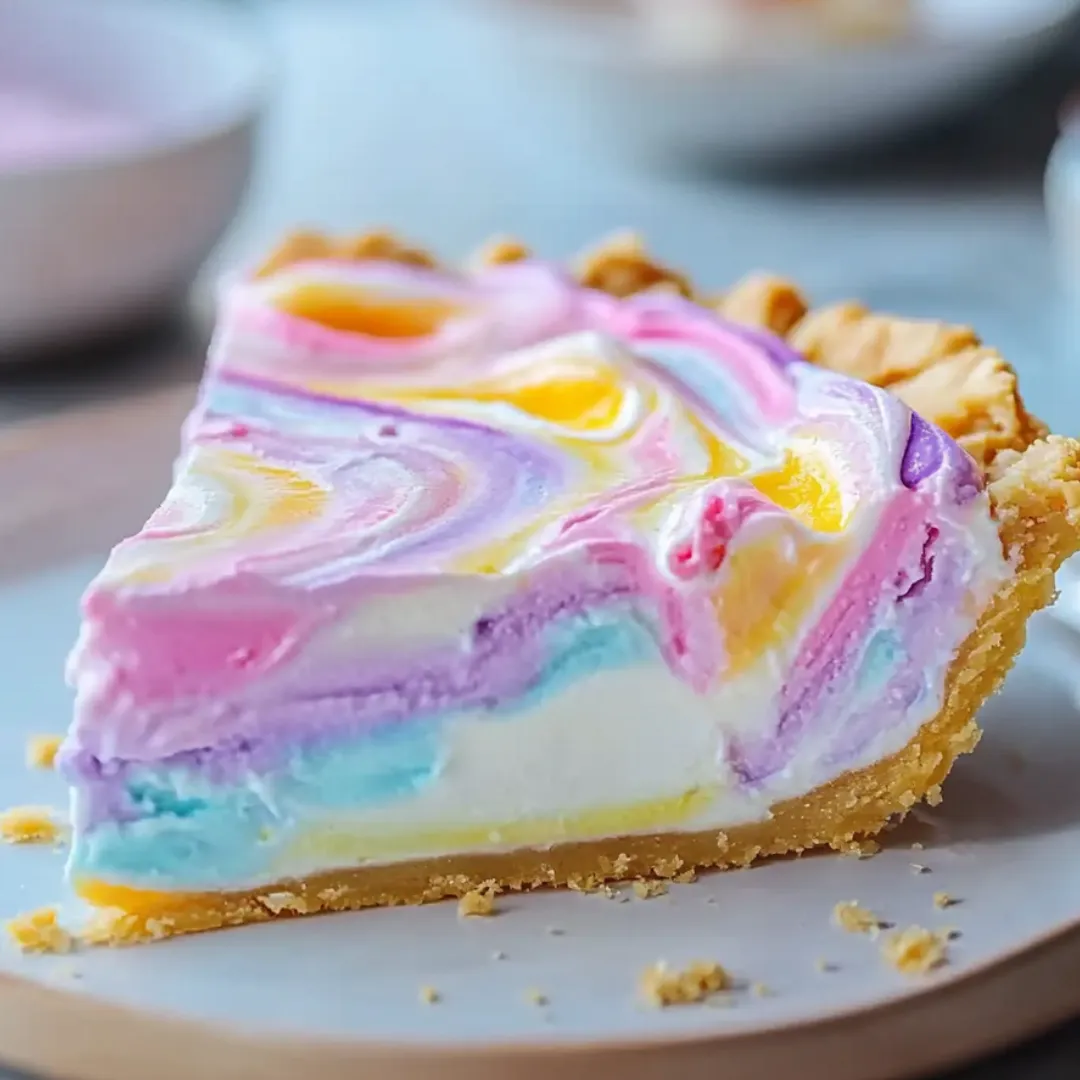
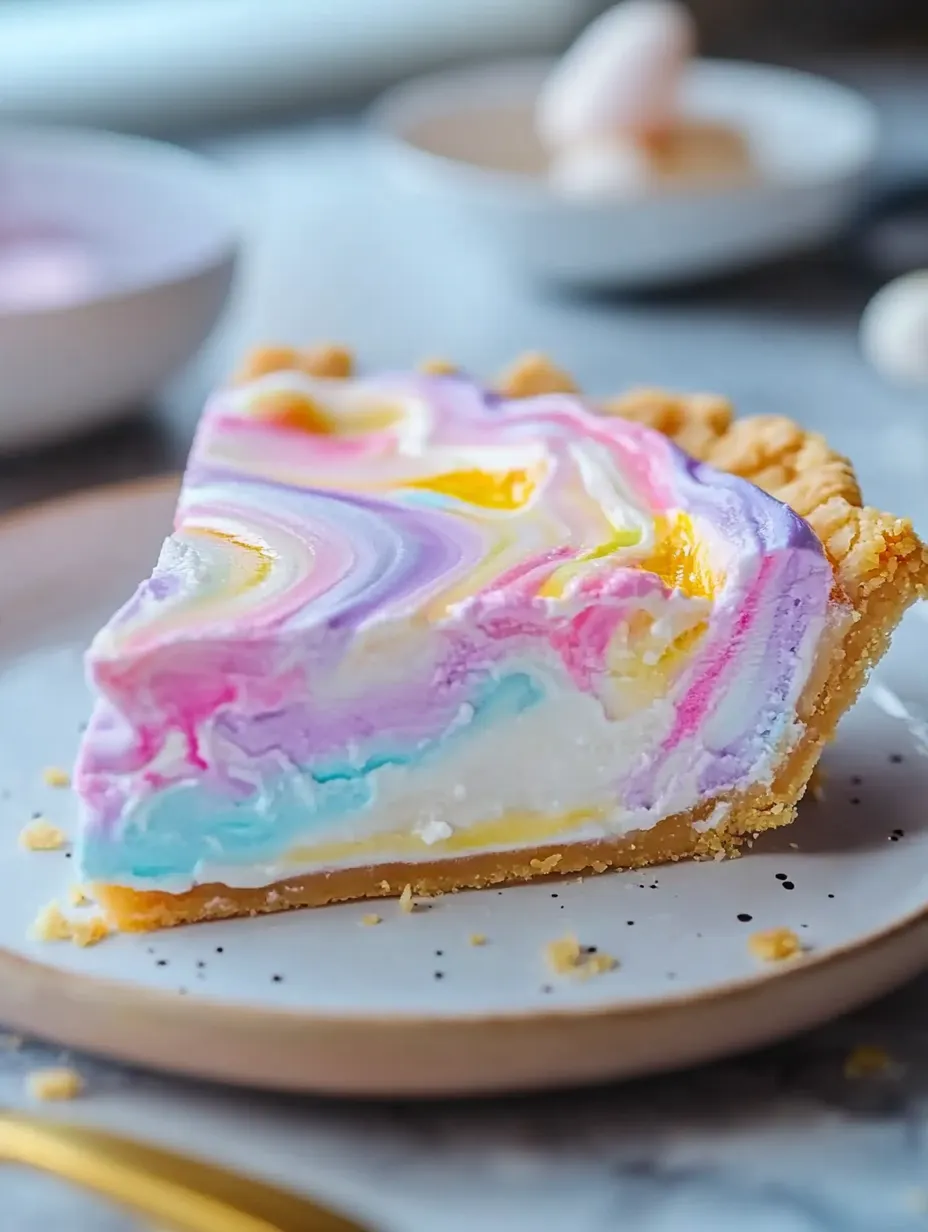
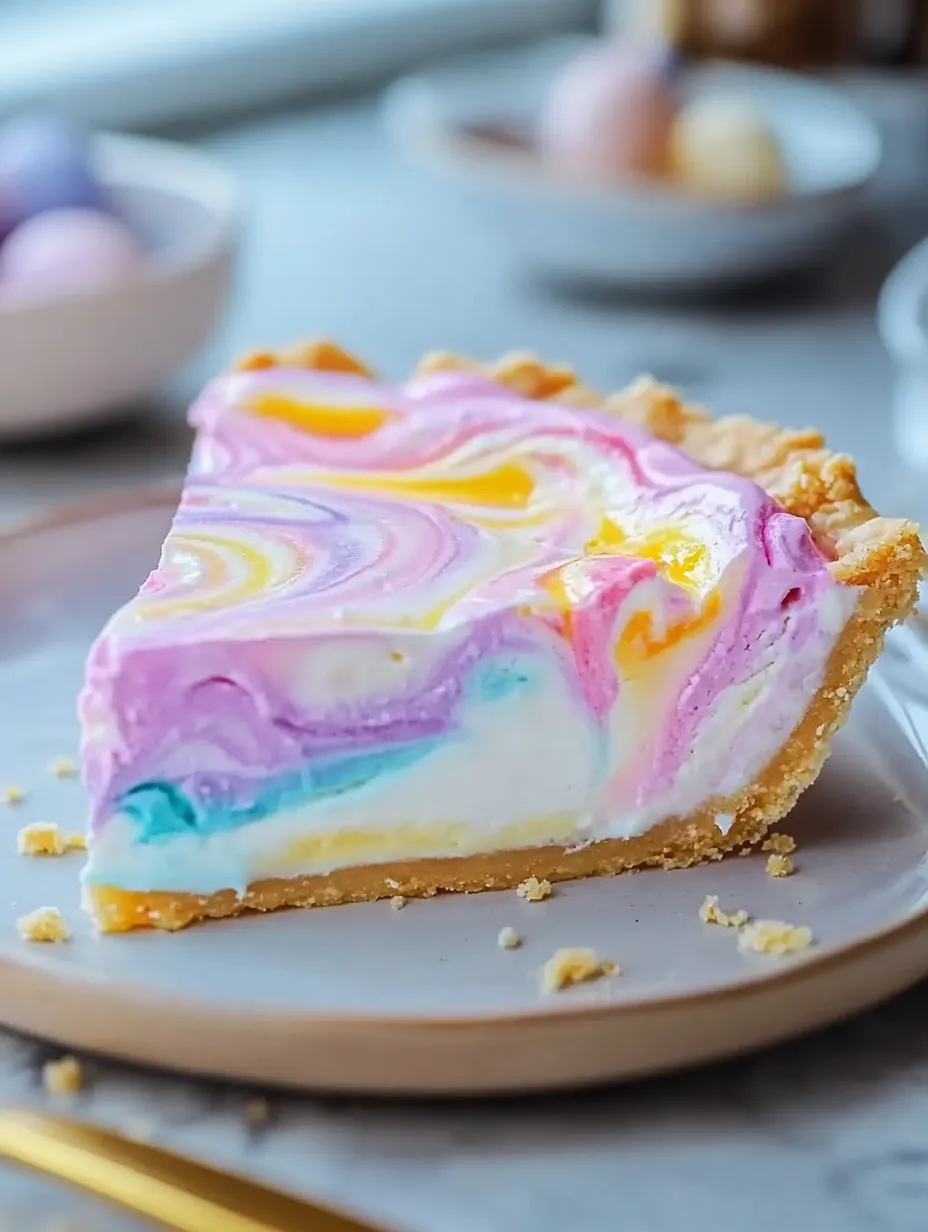
My Easter Swirl Pie has turned into the go-to sweet treat I'm known for at spring get-togethers. It pairs a rich graham cracker base with a fluffy, pastel-marbled filling that never fails to get folks smiling. Those swirled colors don't just make it taste good—they turn it into a real showstopper on any table.
I whipped up this pie for the first time when I needed something wow-worthy to bring to my sister's Easter lunch four years back. The way everyone gasped when I put it on the table has kept it on my must-bring list for every family gathering since.
What You'll Need
- Graham cracker crumbs: they create that sweet, crispy foundation that works so well with the smooth filling
- Unsalted butter: holds your crust together and lets you add just the right amount of salt
- Cream cheese: gives that needed tang to keep the dessert from being too sweet
- Heavy whipping cream: turns your filling into that cloud-like fluff that disappears in your mouth
- Sweetened condensed milk: brings that velvety richness and helps everything firm up nicely
- Gel food coloring: makes those soft Easter hues without making your filling runny
- Easter sprinkles and mini chocolate eggs: add that fun finishing touch kids can't resist
How To Put It Together
- Build Your Base:
- Mix your graham crumbs with sugar and melted butter until everything looks damp. Pack it down hard on the bottom and up the sides of your dish—a measuring cup works great for this. The harder you pack, the better your slices will stay intact.
- Mix Up The Filling Base:
- Beat that cream cheese until it's silky smooth with zero lumps. This really matters for texture. Add your powdered sugar bit by bit while mixing to avoid a sugar cloud in your kitchen. Pour in vanilla and condensed milk, and mix just enough to blend everything without overdoing it.
- Get The Cream Ready:
- In another bowl (make sure it's cold), whip your heavy cream until you get peaks that don't flop over when you lift the beaters. You want it thick enough to hold shape but not so stiff it looks grainy. This step gives your pie that dreamy texture.
- Blend And Tint:
- Carefully fold your whipped cream into your cream cheese mix using a gentle figure-eight motion. Try to keep all that air in there for fluffiness. Split the mix between bowls and add tiny amounts of coloring to each, stirring lightly for those soft Easter shades.
- Make Your Swirl Design:
- Drop spoonfuls of each color randomly into your crust. Grab a toothpick and pull it through in loose figure-eights to create those pretty swirls. Don't go overboard—too much swirling and you'll end up with one blended color instead of distinct patterns.
 Pin
Pin
The way I swirl those soft colors always takes me back to watching my grandma paint Easter eggs. She always went for the softest shades, saying they matched spring's gentle wake-up call. Making this pie lets me keep her memory alive while starting new traditions with my kids.
Plan Ahead Perks
This dessert actually gets better after sitting in the fridge. The flavors come together and the texture gets even creamier after cooling overnight. You can knock this out up to two days before your Easter dinner, which means one less thing to worry about on the big day.
Quick Fixes
If your mixture seems a bit too runny after mixing, stick it in the freezer for 10 minutes before you add the colors. Sometimes your ingredients can warm up too much while you're mixing, especially when your kitchen's warm. A quick cool-down helps everything stay put when you start making those pretty swirls.
Mix It Up
You can tweak this pie all year round just by changing your colors and toppings. Try blue and red for Independence Day, orange and black swirls at Halloween, or Christmas colors in December. The basic recipe stays the same but looks totally different. My fall version with golden and deep orange swirls topped with caramel has become our must-have Thanksgiving sweet.
 Pin
Pin
FAQs About the Recipe
- → Can I swap out the pie crust?
Sure thing! Try an Oreo base or any cookie crust for a different taste. Just change up your crust ingredients to match what you're using.
- → What's the secret to getting those soft pastel shades?
Grab some gel food coloring instead of liquid drops. They'll give you those pretty pastel colors without making your filling runny.
- → Can I whip this up before the big day?
You bet! Make this pie up to two days early and keep it in your fridge until party time.
- → What can I put on top to make it extra special?
Go wild with fresh whipped cream, colorful Easter sprinkles, tiny chocolate eggs, or any cute pastel candies to make it look super festive.
- → How do I create those pretty swirls?
Drop spoonfuls of your colored mixtures randomly into the crust, then grab a toothpick and gently drag it through to create swirls. Don't mix too much or you'll lose the pattern!