
 Pin
Pin
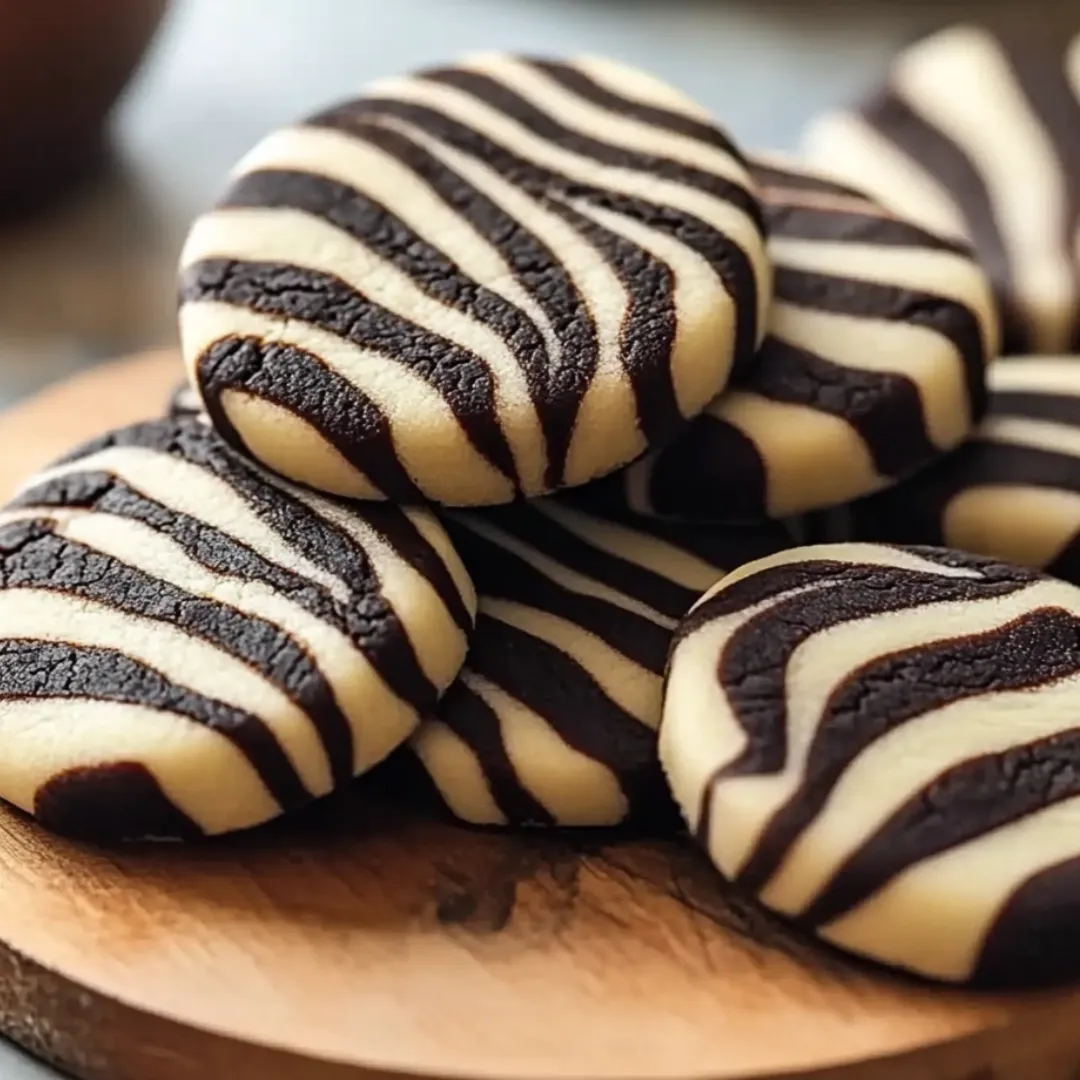
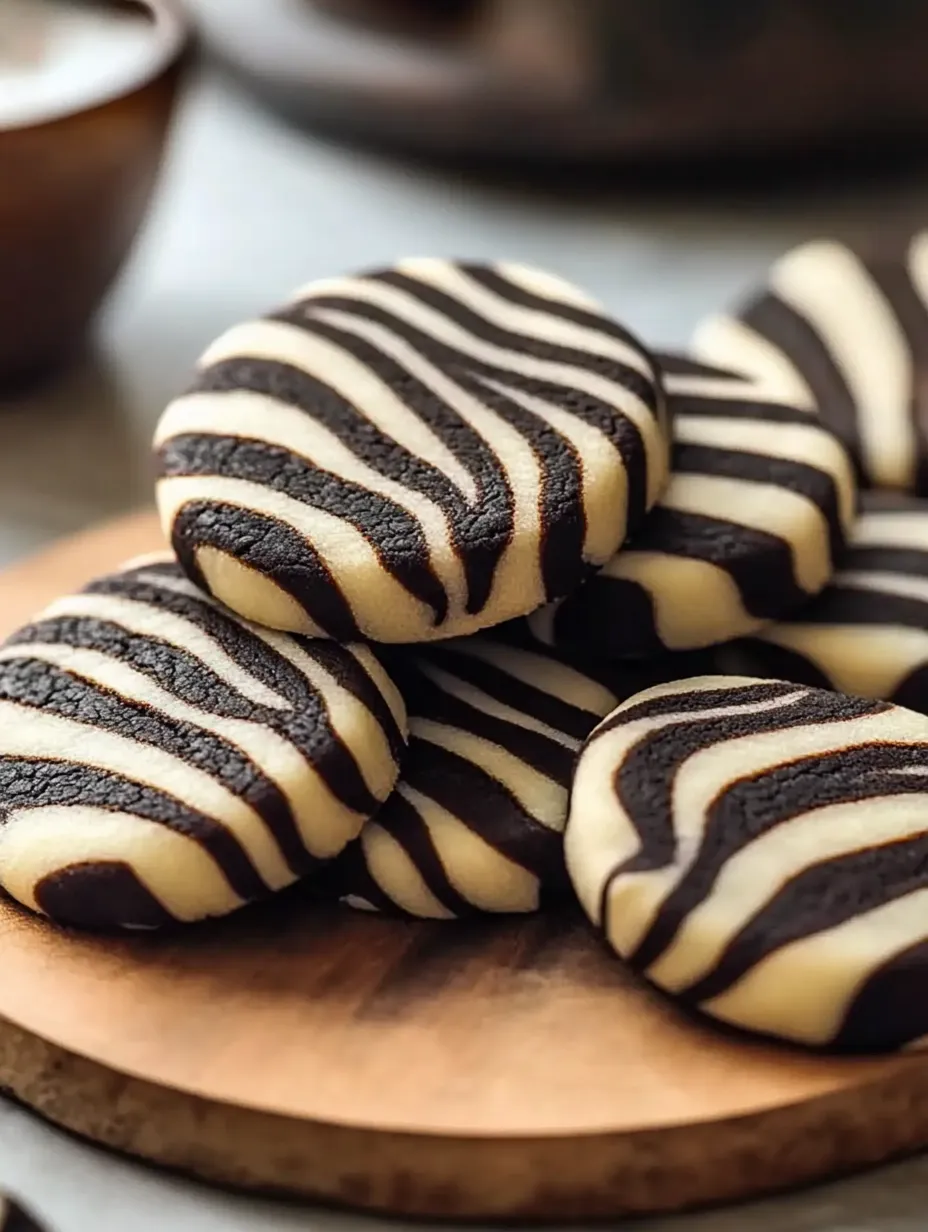
Wow your friends and family with these stunning Zebra Cookies. They're a go-to when you're after a treat that's both eye-catching and seriously tasty. The bold chocolate and vanilla stripes always earn compliments, plus you can whip them up with stuff you probably already have in your kitchen.
Everybody in my house gets a kick out of twisting the dough into wild stripes. Seriously, the first time we tried making these, the entire batch disappeared in one day because we just kept eating and admiring them.
Tasty Ingredients
- Salt: boosts all the flavors, use fine or kosher for even mixing
- Vanilla extract: brings a great smell use the real deal for full aroma
- Granulated sugar: gives a touch of sweetness and helps keep cookies light
- Baking powder: helps them puff up a bit, make sure it’s fresh
- All-purpose flour: holds everything together and gives a soft bite, so fresher is better
- Unsweetened cocoa powder: adds that rich chocolatey layer try Dutch-process for deeper flavor
- Large eggs: keeps your dough in shape and makes cookies tender, bring them to room temp before you start
- Unsalted butter: makes cookies rich and creamy, let it soften for easy mixing
Irresistible Step-by-Step
- Shape and Bake:
- Flatten the dough balls gently with your palm or a glass. Pop them into a 350 degree Fahrenheit oven for 10–12 minutes. They're ready when edges are firm but centers look soft. Let them cool on racks so they finish setting up right.
- Create the Zebra Swirls:
- Grab a skewer, toothpick, or a small knife and drag it through the dough spots to swirl the colors together. Don't stir too much or the stripes will blend too much.
- Layer the Doughs:
- Scoop little blobs of both chocolate and vanilla dough next to each other on your baking sheet. Let the pieces touch but keep the colors separate.
- Divide and Flavor:
- Split your dough in half. Keep one batch plain for vanilla. Mix cocoa powder into the other half until it's a deep chocolate brown. Now you've got both flavors ready to go.
- Mix in Dry Ingredients:
- In a separate bowl, stir together flour, salt, and baking powder. Add this slowly to your wet mix. Only mix until it's just coming together so the cookies don't get tough.
- Add Wet Ingredients:
- Add eggs one at a time, making sure each is mixed in before adding the next, then the vanilla. Beat until it looks nice and creamy—this makes the flavor pop.
- Make the Base Dough:
- Start by creaming the softened butter with sugar for around three minutes using a mixer. Stop and scrape the bowl down once or twice. You want it light and fluffy so the cookies almost melt in your mouth.
 Pin
Pin
I always look forward to tossing in the cocoa—the smell takes over my kitchen and reminds me of a bakery. One holiday, my kid insisted on doing all the swirling himself, and the patterns were wild but still tasted amazing.
Keeping Them Fresh
These cookies stay yummy for up to four days if you keep them in an airtight tin on your counter. If you want to make them last even longer, freeze them in a single layer first, then toss them in bags. They thaw out quick and taste just-baked. Skip the fridge—they'll dry out there.
Swap Outs
Try almond extract instead of vanilla for a different vibe. For a dairy-free, egg-free version, use vegan butter and flax eggs. Get creative and swap matcha or red velvet powder for some cocoa if you want to shake up the look.
How to Serve
Pair these cookies with a steaming mug of cocoa or show them off on a dessert platter. They're sure to impress at cookie exchanges and stack up beautifully as tasty little gifts.
 Pin
Pin
Fun Backstory
These eye-catching stripes grew out of the popular trend of swirling baked goods, first seen in cakes and muffins. With these cookies, you get the chewy, buttery base of a classic American treat mixed with a pattern that always gets people talking. They're like animal print you can eat.
FAQs About the Recipe
- → What's an easy way to create those zebra swirls?
Spoon your chocolate and vanilla doughs in layers and gently swirl with a toothpick or a skewer. That's how you get those great stripes.
- → Is it fine to swap in salted butter?
Totally! Just cut down on any extra salt so your cookies don't turn out too salty.
- → How should the dough feel before it gets baked?
You want it smooth and soft but not sticky, so you can shape and swirl it easily without losing the pattern.
- → What's the trick for keeping these cookies soft?
Don't bake too long! Grab them from the oven when the edges are firm but the middles still look a tad gooey. They'll finish up as they cool.
- → Would the dough freeze well if I prep ahead?
Yep, wrap up both flavors nice and tight and pop them in the freezer. Thaw in your fridge before using and you're good to go.