
 Pin
Pin
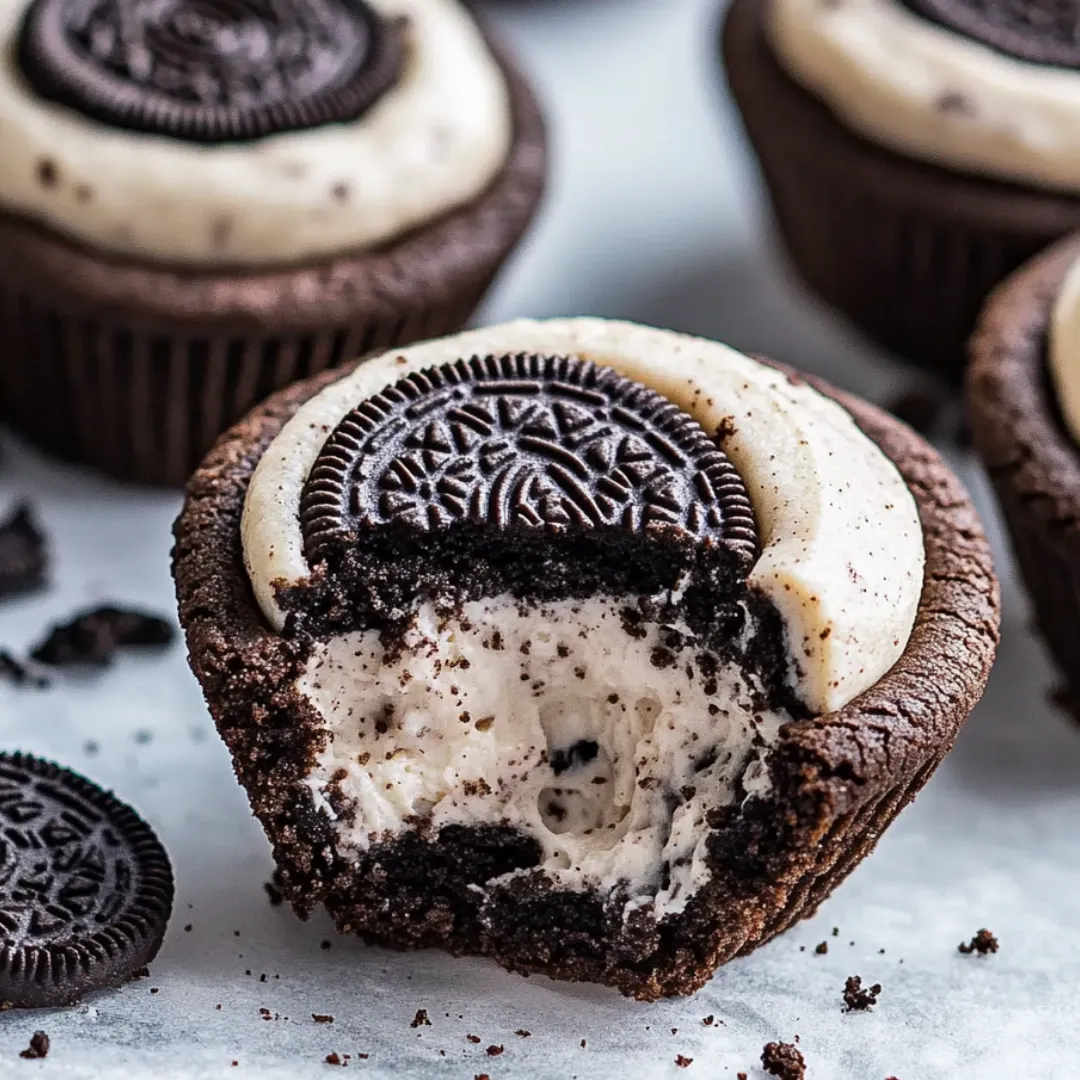
Chocolatey cookie cups loaded with a creamy Oreo filling bring the best of two classics together. The cookie base is the perfect spot for a tangy cheesecake center that’ll wow your friends or curb a late-night craving.
I whipped these up for my kid’s last birthday bash, and they vanished faster than I could blink. Now my family asks for them at every get-together, and my nephew (who’s obsessed with Oreos) is always first in line.
Irresistible Ingredients
- Oreo cookie crumbs: pack loads of that classic cookies-and-cream flavor into the filling
- Full-fat cream cheese: makes the filling smooth with a signature tangy kick
- Heavy whipping cream: brings a fluffy, light texture to the creamy center
- Vanilla extract: boosts and blends all the chocolatey notes
- Large eggs: hold everything together and make it rich
- Light brown sugar: makes the cookies moist and adds rich caramel-like undertones
- Granulated sugar: sweetens and adds some crunch to the edges
- Unsalted butter: room temperature is key for mixing easily
- Salt: balances out all that sweetness and brightens flavors
- Baking soda: helps the dough puff and makes the cups rise
- Black cocoa powder: brings that extra-dark Oreo color and taste
- Dutch-processed cocoa powder: smooth chocolate flavor to back up the base
- All-purpose flour: creates a soft but sturdy cup for all the filling
Simple Step-by-Step Directions
- Set up Filling First:
- Whip your heavy cream in a super cold bowl using chilled mixer attachments until it becomes thick and holds peaks. In another bowl, blend cream cheese and sugar until smooth. Mix in Oreo crumbs. Gently mix in the whipped cream, being careful not to take out all the air. Scoop into a piping bag with a big star tip and keep chilled till you’re ready to fill.
- Cool Your Cookie Cups:
- Once baked, let the cups sit in the tin for ten minutes. Gently twist so nothing sticks. Wait a few minutes more, and move to a rack to finish cooling completely. Don’t rush it—otherwise, they might break.
- Bake and Shape the Cups:
- Bake about 10-13 minutes. Look for firm edges and slightly soft centers. Pull them out and, while they’re hot, grab a spice jar or little glass and quickly press the middle down to make a well for your filling. Ignore how soft they feel—they’ll set up as they cool.
- Shape the Dough:
- Scoop out dough with a 3-tablespoon-sized scoop and drop it into your muffin tin. Gently flatten the tops—it helps them bake even.
- Add the Flour Mix:
- Pour in the flour mixture slowly with the mixer on low until you don’t see any powder left. Stop mixing as soon as it’s all combined. Too much mixing can turn the cookie cups tough, so trust your instincts and stop early.
- Add Wet Stuff:
- Lower your mixer’s speed. Toss in the eggs one by one, mixing well each time. Add your vanilla, scraping the sides of the bowl if you have to.Just make sure it’s all blended.
- Cream Butter & Sugars:
- Use your stand or hand mixer on medium-high. Whip the butter and both sugars together until it’s lighter and fluffier (about 2-3 minutes). This step pumps in extra air for a chewy cookie cup.
- Mix Dry Ingredients:
- Grab a medium bowl and whisk together flour, both cocoa powders, baking soda, and salt. Sift the cocoa so you avoid any weird bitter spots later on. Spend a minute on this so it’s all even.
- Get the Muffin Pan Ready:
- Fire up the oven to 350°F. Spray your muffin tin really well—even those corners. Spray works better than liners so you don’t lose the cup’s shape.
- Fill Everything Up:
- Pipe big swirls of the cheesecake mixture into your cooled cookie cups. You want them nice and full.
- Chill and Dig In:
- Pop the finished cups into the fridge for an hour or two for the filling to set up. Top with more Oreo crumbs if you want right before serving for a little extra something.
 Pin
Pin
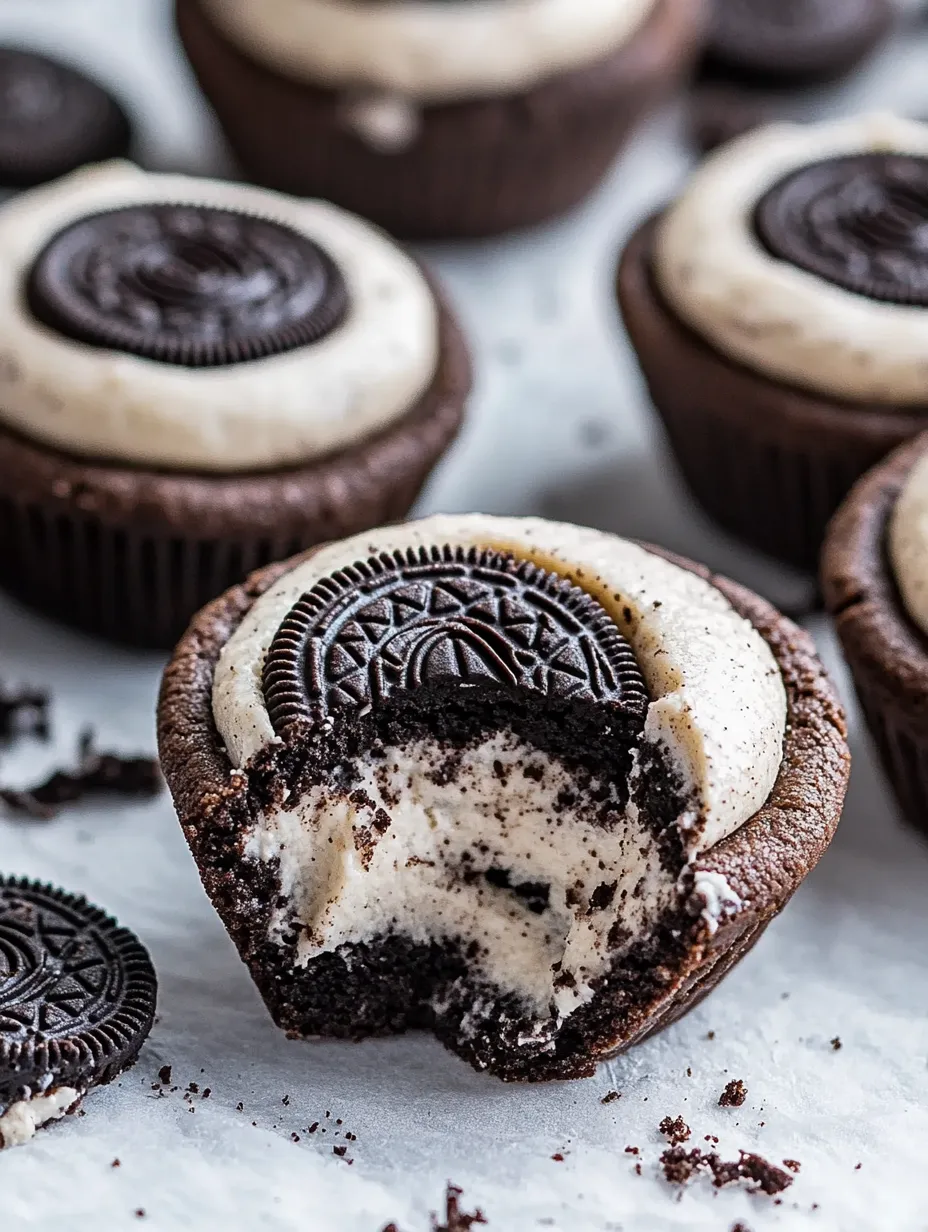
The first batch I ever made, I forgot to press down the centers while they were warm. They ended up looking more like dense cupcakes, but honestly? Still amazing. I realized these treats are really forgiving and turn out delish even if things don’t go exactly as planned.
 Pin
Pin
Freezer-Friendly Options
You can stash plain, unfilled cookie cups in the freezer up to three months. Use parchment between layers in a sealed container so they don’t stick together. When you’re ready, let them sit out at room temp for about an hour, then fill ’em up.
Swaps for Ingredients
No black cocoa? Either just use all Dutch-process cocoa or another dark cocoa you’ve got. Your cups won’t be pitch black but will still be crazy chocolaty—just with more classic brownie vibes than the intense Oreo hit...
Helpful Tricks
FAQs About the Recipe
- → Can I whip these up in advance?
Absolutely! Put them in the fridge for up to three days, or keep them in the freezer for about a month.
- → What if I can’t find black cocoa powder?
Dutch-process cocoa works too—the look and taste won't match exactly, but it'll still be yummy.
- → How do I crush Oreos for crumbs?
Throw the cookie parts in a food processor. Or, toss them in a zip bag and roll over them with a rolling pin.
- → Could I stuff these with something else?
You sure can! Try swaping in flavors like vanilla, peanut butter, or jam for a twist.
- → Should I chill my filling first?
Yep! Let it cool in the fridge for an hour or two before you pipe it in. That way, it holds up better.