
 Pin
Pin
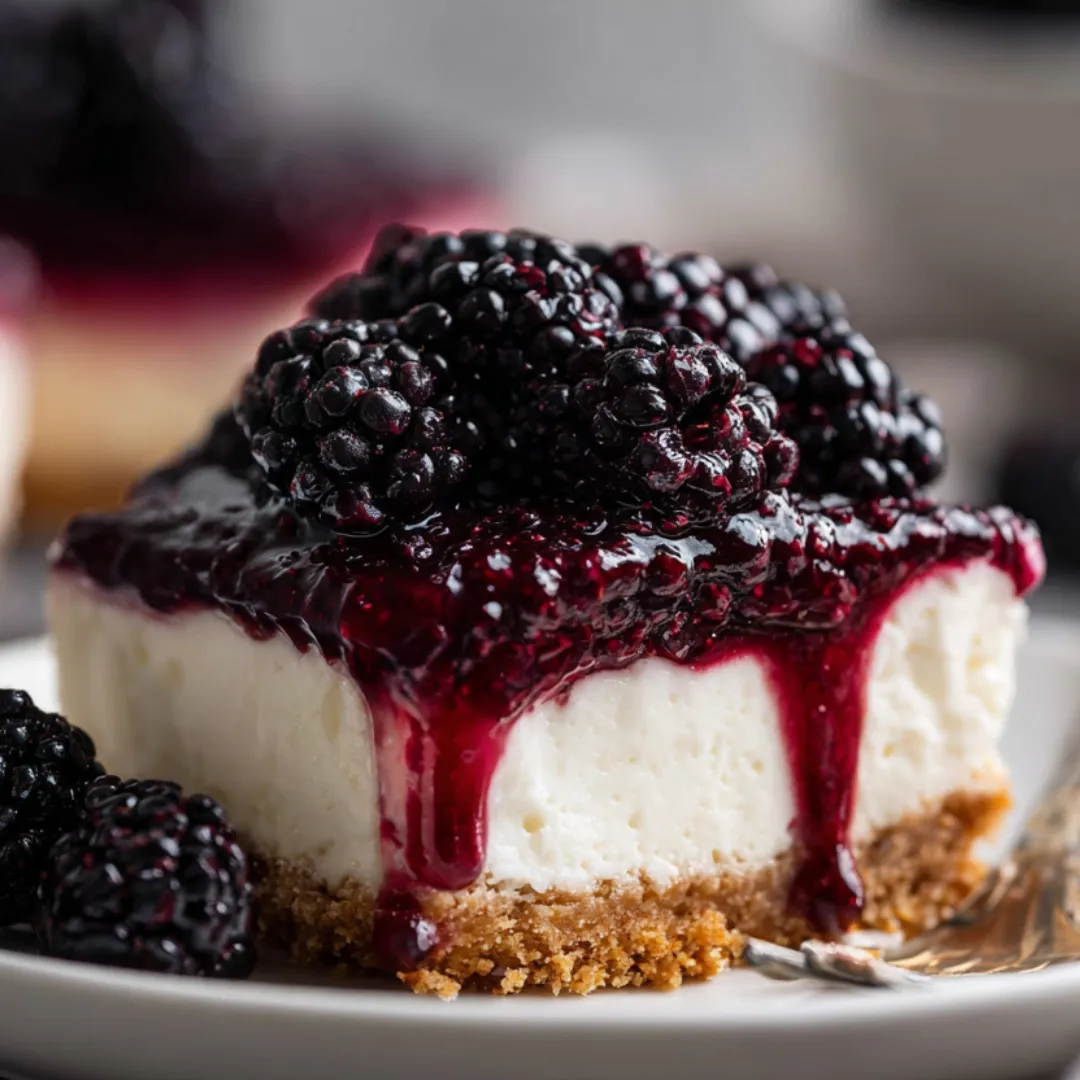
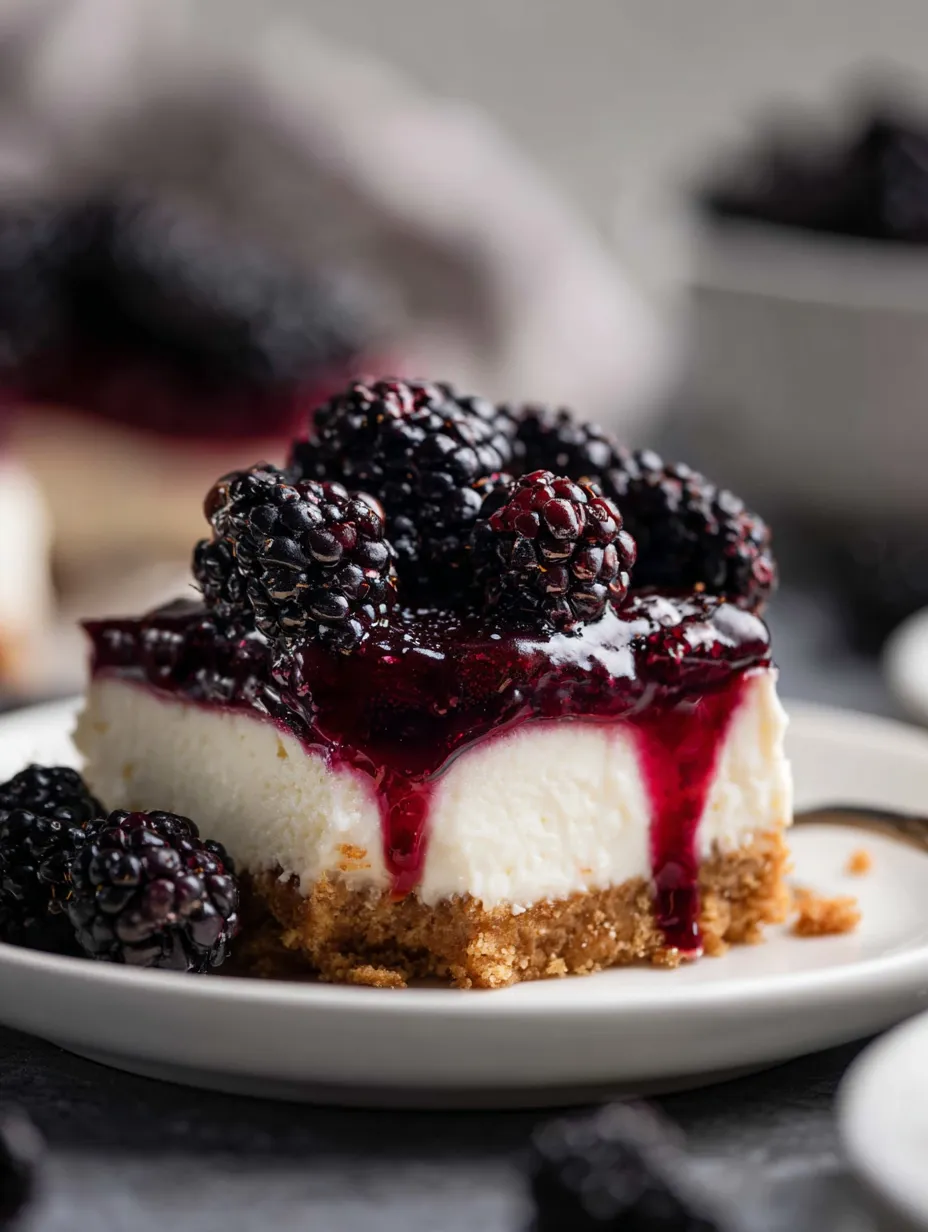
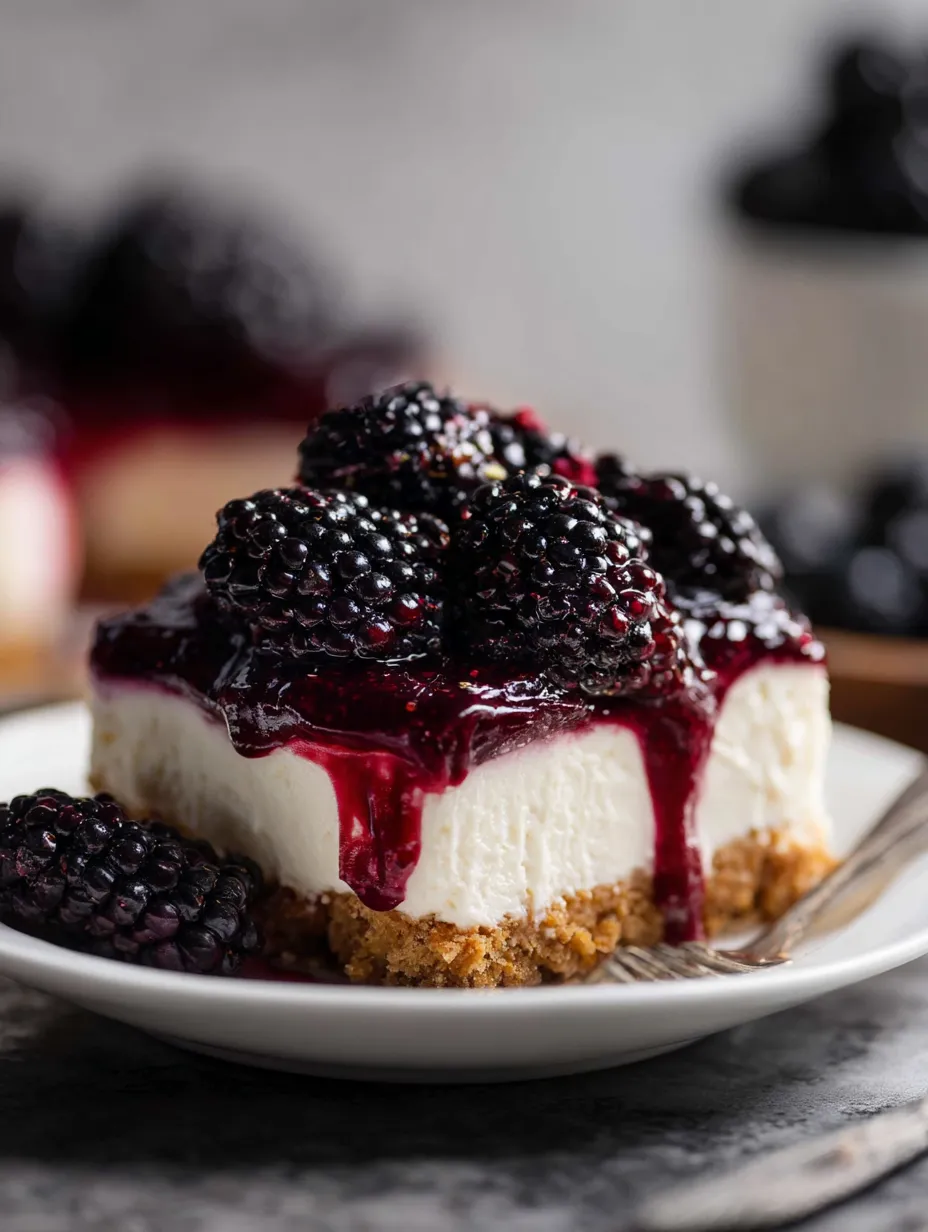
I love how this chilled blackberry cheesecake turns heads without needing you to mess with an oven or stress about any cracks. The creamy, tangy filling pairs with a juicy berry sauce you can whip up fast, and it looks gorgeous too. The buttery graham layer comes together in no time—the whole dessert hangs out in the fridge to set up while you get other stuff done.
Whenever a holiday rolls around, my family asks for this—especially in July. It always goes over big. Honestly, sneaking a bite of that smooth filling before chilling is the highlight for me.
Irresistible Ingredients
- Salted butter: keeps everything together and boosts flavor Go for a fresh stick for the richest color and taste
- Graham cracker crumbs: come together in a snap for the golden crust Crush them yourself for a great texture or use a favorite brand
- Heavy whipping cream: gives the filling a fluffy, light feel Pop your bowl and beaters in the fridge for the thickest whipped cream
- Sour cream: keeps it bright and creamy Steer clear of the extra-thick Greek stuff
- Powdered sugar: mixes right into the filling to sweeten it Look for powdered sugar without any lump-preventers if you can
- Cream cheese: gives the filling that classic creamy tang Use the full-fat kind in a block for the smoothest results
- Water and cornstarch: create that luscious, glossy sauce with the berries Make sure your cornstarch is fresh for the best thickening
- Ground cinnamon: adds a gentle warmth to the berry topping Check for a jar that smells nice and spicy
- Vanilla extract: gives everything a cozy, sweet aroma Use a good one since there’s no baking to mask the flavor
- Granulated sugar: sweetens up both the berry topping and the crust I like a finer sugar since it dissolves super fast
- Fresh blackberries: bring brightness and lots of juice for the sauce Pick out berries that are deep purple and plump
Simple Step-by-Step Directions
- Finish and Slice:
- Spoon the cooled berry topping all over the firmed-up top Cut with a wet knife for clean pieces and chill the slices so the texture stays dreamy
- Get That Filling Ready:
- Smooth the filling over your set crust Spread with an offset spatula for sharp sides Chill at least four hours—or overnight if you can—so it gets nice and firm for slicing
- Whip the Cream:
- Pour cold cream into that cold bowl Beat with a mixer until you’ve got stiff shiny peaks Don’t go too long or it’ll lose its light, cloud-like feel
- Press Down in the Pan:
- Press crumb mixture firmly across the base of a 9x13 pan Smooth those corners and edges out Freeze it for about ten minutes so the crust stays together
- Mix the Cream Cheese Layer:
- Beat together cream cheese, powdered sugar, vanilla, and sour cream Go until it’s totally smooth and lump-free Scrape the sides so nothing’s left out
- Get the Crust Going:
- Stir sugar and graham crumbs together Melt your butter and mix it right in Everything should look like wet sand and hold together
- Gently Mix Fillings:
- Fold that whipped cream into the cream cheese Use a spatula—go lightly so it stays airy Mix until it just comes together, don’t overdo it
- Berry Sauce Magic:
- Add blackberries, cinnamon, sugar, water, cornstarch, and vanilla to a saucepan Cook on medium, stirring, until the berries pop and you get a thick, shiny sauce Let it cool off to room temp
 Pin
Pin
The way the cinnamon and vanilla cozy up and mellow out those berries on top? That’s my favorite part. Reminds me of picking berries with my grandma and sneaking them straight into my mouth while she laughed.
How to Store
This dessert stays nice and fresh in the fridge for a good three days. If you want to save it longer, you can freeze the creamy filling and the berry sauce on their own. Thaw the base in the fridge overnight before you put them together, and only add the berries when you’re ready to eat for the best flavor and texture.
Swap-Out Ideas
If fresh blackberries aren’t handy, frozen ones work—just thaw and drain off the juice. Raspberries or blueberries are a fun twist too. If you want to lighten it up, plain Greek yogurt stands in for sour cream, and gluten-free graham crackers make an allergy-friendly crust without any trouble.
Serving Ideas
Dress things up by showering extra berries or a bit of grated lemon zest over the slices. Top with more whipped cream, or team up with lemonade or iced tea for a summer treat. Cutting into bite-size squares works great for sharing at buffets or family parties, too.
 Pin
Pin
Background and Traditions
No bake cheesecakes really got popular in the ‘50s and ‘60s, when folks wanted a simple, fresher option instead of heavy, baked versions. This chilled treat brings that easy American vibe and gives a little wink to old school European berry desserts. That blackberry sauce always takes me back to sweet, homemade jams and summer sweets on the porch.
FAQs About the Recipe
- → How do I serve neat slices?
Chill it completely so the layers hold together. Slice with a sharp, hot knife and wipe clean between pieces for those super tidy edges.
- → Are there alternative spices for the blackberry layer?
If you feel like mixing it up, try nutmeg or ground coriander instead of cinnamon for a twist on the flavor. Cinnamon’s classic, but have fun with it!
- → How far in advance can I prepare this dessert?
You can make all the parts early. The finished dish will keep in the fridge for three days, or stick the separate layers in the freezer if you’re planning further ahead.
- → What's the secret to a smooth, airy filling?
Whip up cream separately so it gets fluffy, then work the cheese mixture until it’s creamy. Gently fold the two together so your filling stays super light.
- → Can I use frozen blackberries for the topping?
Frozen ones are just fine. Don’t bother thawing, just cook them a bit longer while simmering, that’s all it takes.
- → How do I get a firm crust that doesn't crumble?
You want to really blend your melted butter into those crumbs with sugar, then pack it down nice and even in the pan. Stick the dish in the fridge or freezer so it sets up before you add everything else.