
 Pin
Pin
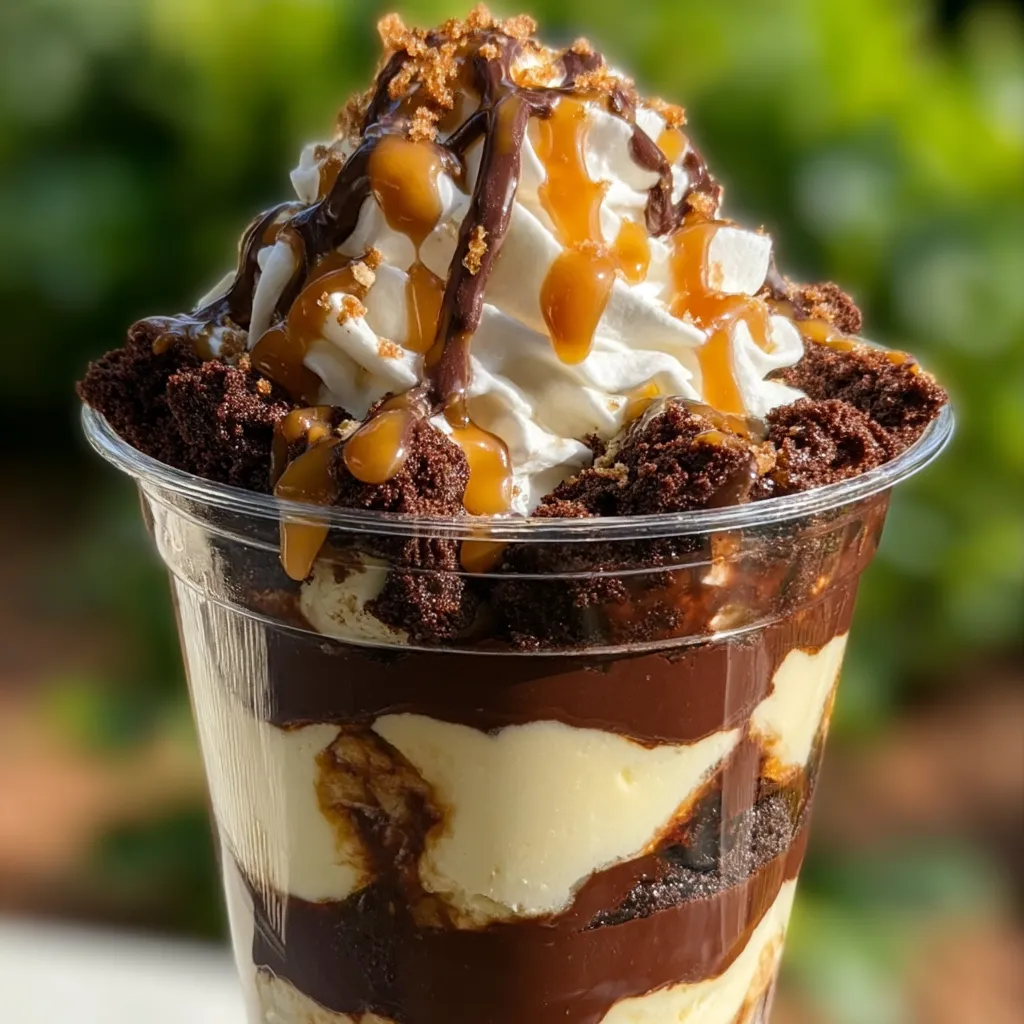
These no-fuss brownie cheesecake cups turn basic items into a fancy, eye-catching sweet that's great for guests or just treating yourself. When you mix gooey brownies with fluffy cheesecake and tasty toppings, you get something that hits all the right spots for anyone craving something sweet.
I whipped these cups up when friends were coming over and I was running behind. They couldn't believe I made them myself – they thought they came from a fancy shop! Now whenever I need something that looks impressive but won't let me down, this is what I make.
What You'll Need
- Rich brownies: Go for ones that stay gooey inside with a slightly crisp top for the best bite feel
- Cream cheese: Has to be the full-fat kind, left out till completely soft for that smooth mix
- Heavy cream: Pick one with at least 36% fat so it whips up nice and stays firm
- Sugar powder: Run it through a strainer first to avoid bumps in your cheesecake mix
- Real vanilla: Skip the fake stuff if you want that true, rich flavor
- Melted chocolate topping: Using good chocolate makes a velvety layer that hardens just right
- Thick caramel: You want the kind that pours slowly to make those pretty drips
- Extra bits: Things like flaky sea salt really bring out the chocolate and make it look fancy
How To Make It
- Mix Up Your Cheesecake:
- Grab your soft cream cheese and beat it in a big bowl until it's totally smooth – no lumps allowed! This takes about 2 minutes with a mixer. Dump in your powdered sugar and vanilla, then keep beating until it gets light and fluffy. It should feel silky on your tongue. In another bowl, whip your heavy cream until it stands up straight when you pull the beater out. Now fold the whipped cream into your cheese mix with a rubber spatula. Be gentle – cut down the middle, scrape the bottom, then fold over the top so you don't lose all that air you just added.
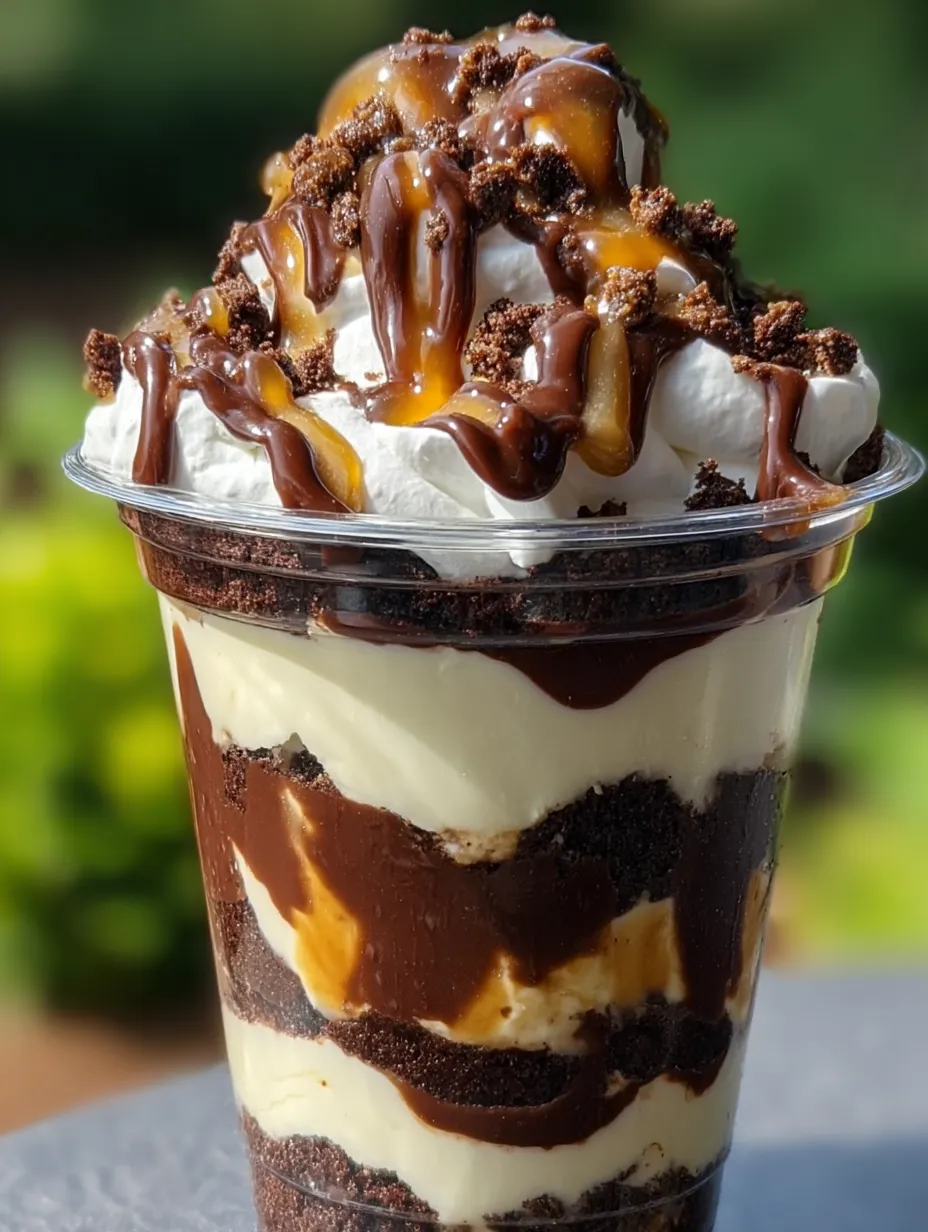
- Start Your Bottom Layer:
- Put about 2 spoonfuls of crumbled brownie at the bottom of each cup and press down a little bit. Your brownies should be room temp or just a bit cool, not frozen, so they break up easily. Make the layer even so you get brownie in every bite.
- Add Your Creamy Layer:
- Put your cheesecake mix in a piping bag with a big round tip if you want it to look super neat. Squeeze a good layer over your brownie base, working from the outside in with a spiral. Don't have a piping bag? Just use a spoon and smooth it out. Make this layer about half an inch thick.
- Make It Saucy:
- Warm up your chocolate and caramel so they pour nicely but aren't hot enough to melt your cheesecake. With a small spoon, drizzle some chocolate then some caramel in a zigzag across the top. Squeeze bottles work great too if you have them. Just use enough to see the pretty lines without drowning everything.
- Build It Higher:
- Do another round of brownie bits, cheesecake stuff, and drizzles until your cup is full. Usually you'll fit two or three complete sets depending on how big your cups are. In clear cups, you can see all the pretty layers from the side which looks awesome.
- Top It Off:
- Finish with a little dollop of cheesecake mix, then add some brownie crumbs, more sauce drizzles, and maybe some crushed nuts or sea salt. You want it to look casually fancy, like a little dessert landscape on top.
 Pin
Pin
What really makes these cups stand out is how the dense, fudgy brownie plays against the light, fluffy cheesecake part. My mom always said texture matters just as much as taste, and this dessert proves she was spot on. I've watched even picky dessert snobs close their eyes and smile when they take their first bite.
Ways To Serve
These single-serve treats look amazing on a tiered stand at parties. They pair really well with coffee drinks like espresso martinis or Irish coffee, which go great with all that chocolate. In hot weather, try tucking some fresh raspberries or strawberries between the layers to cut through the richness.
Keeping It Fresh
You can keep these cups in the fridge for up to three days if you wrap them tightly. They actually taste better on day two after the flavors have had time to mix together, so they're perfect to make ahead. Don't try freezing them though – the cheesecake part might get grainy when it thaws and the caramel can break apart.
Switch It Up
You can change this basic idea in so many ways. Try using red velvet cake, peanut butter brownies, or even cookie dough instead of plain brownies. For grown-up parties, add a splash of Baileys, Kahlua, or Amaretto to the cheesecake mix for a boozy kick. During Christmas, mix in some crushed candy canes, or add pumpkin spice when fall comes around.
 Pin
Pin
FAQs About the Recipe
- → Can I use store-bought brownies for this dessert?
Absolutely, ready-made brownies from the store work fine, though homemade ones will give you better taste and texture.
- → How do I prevent lumps in the cheesecake filling?
Make sure your cream cheese isn't cold and beat it thoroughly until you can't see any bumps.
- → Can these be made ahead of time?
For sure, you can make them a day early and keep them wrapped in the fridge until you need them.
- → What are some creative topping ideas?
Try sprinkling some chopped nuts, chocolate bits, drizzled caramel, crushed candy, or fresh fruit on top.
- → Do I need fancy dessert cups for this recipe?
Nope! Any small cups, mason jars, or even drinking glasses will do the trick and look great.
- → How can I make the layers more distinct?
Try using a frosting bag for adding the cheese layer and make sure to flatten each part before adding the next one.