
 Pin
Pin
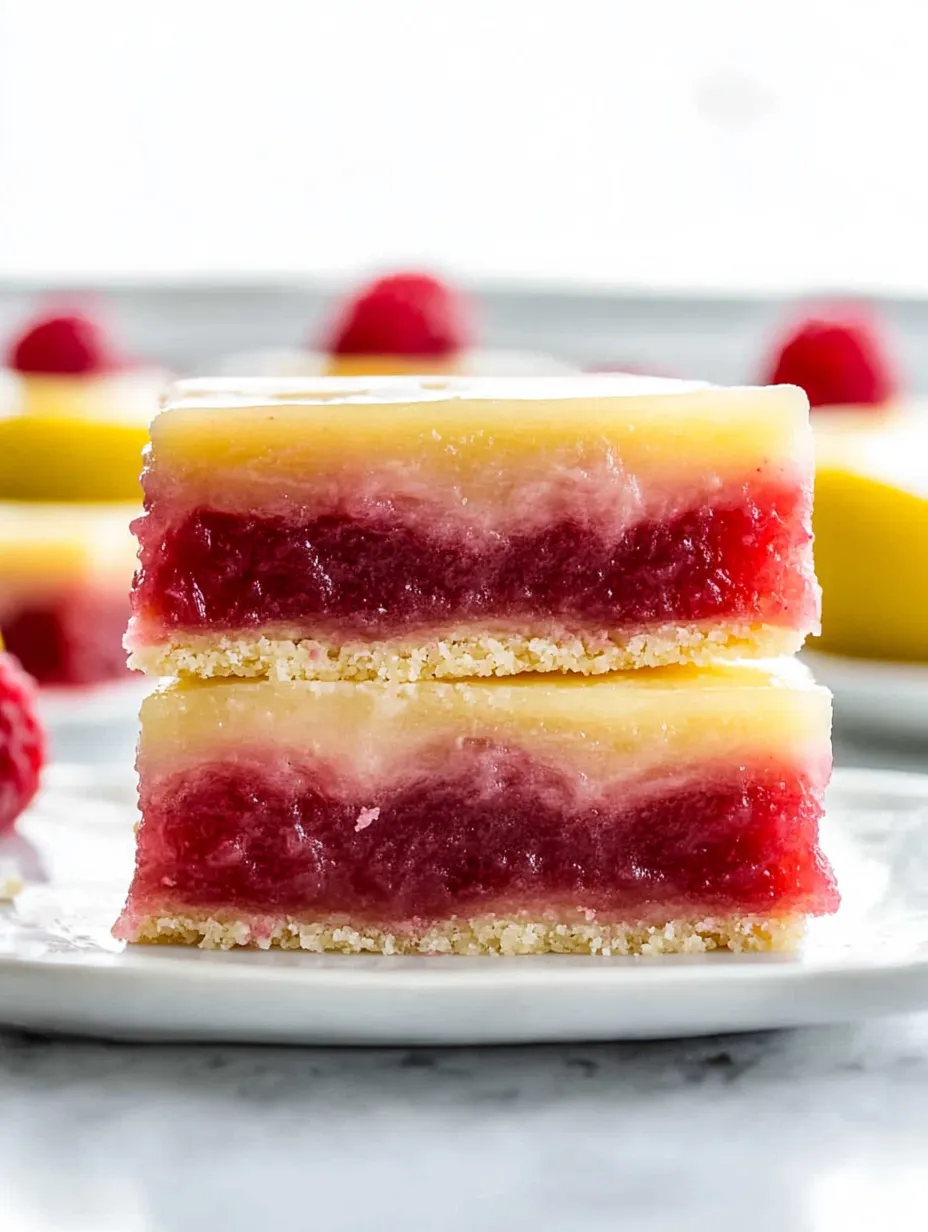
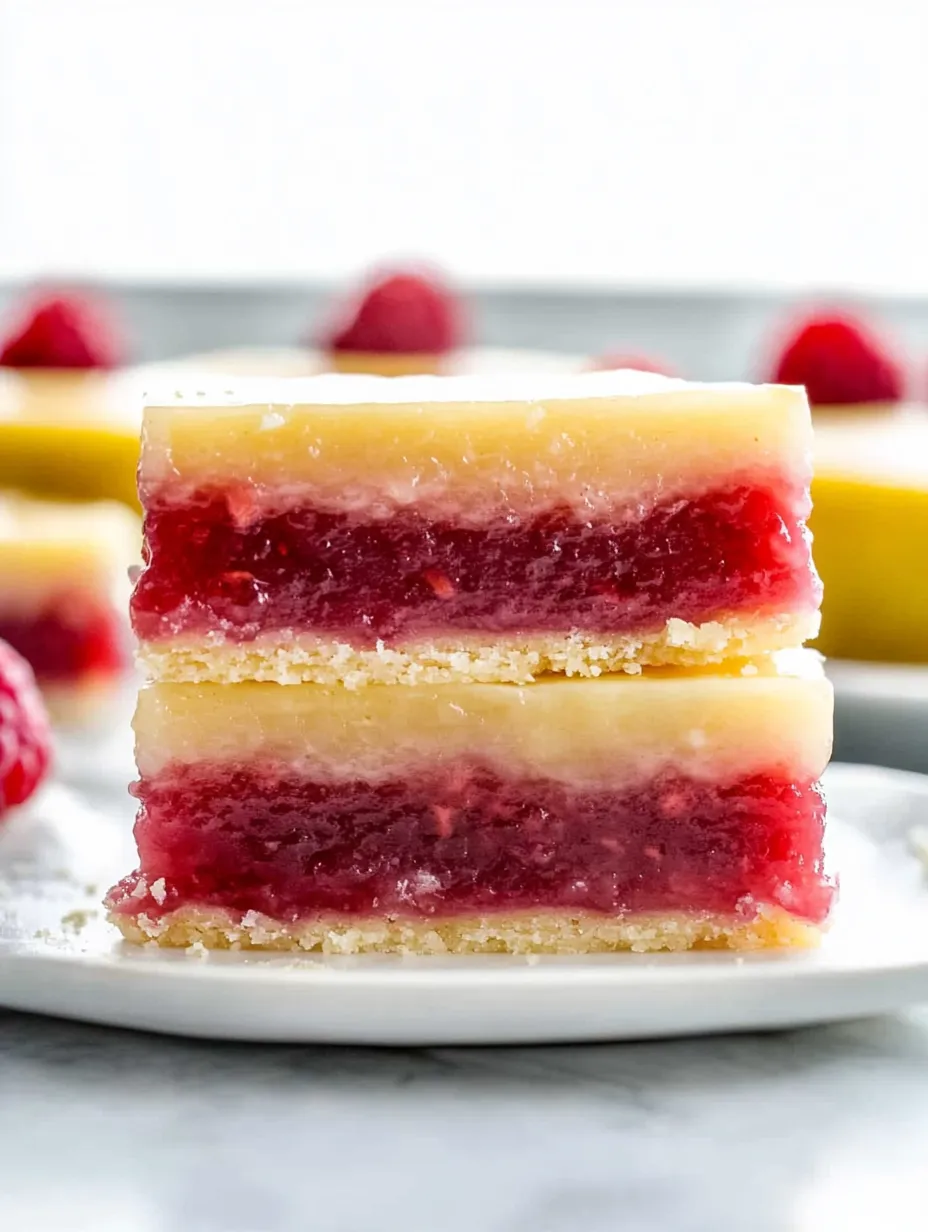
These tangy lemon raspberry squares take an old favorite to new heights by blending raspberry puree with the classic lemon custard. The combo of a buttery crust and a zingy fruit topping creates a treat that feels both comforting and fresh at the same time.
I whipped these up for a backyard get-together last summer and they vanished in moments. Everyone's drawn to their gorgeous pink color, and I always end up sharing the instructions after people try their first square.
What You'll Need
- Raspberries (fresh or frozen): They give these bars their lovely color and fruity kick. Fresh ones taste brighter, but frozen work great when they're out of season.
- All purpose flour: Forms a base that's just right - not too hard or too soft. Go for unbleached if you can.
- Granulated sugar: Cuts through the tartness of the fruits without being too sweet.
- Cornstarch: Makes the filling thick and gives the crust that melt-in-your-mouth feel.
- Unsalted butter: Brings richness to the shortbread bottom. Don't skimp on quality here.
- Fresh lemons: A must-have! The stuff in bottles won't work - it's too harsh and throws off the whole balance.
- Large eggs: They hold the filling together and add creaminess. Let them sit out before using for smoother mixing.
How To Make Them
- Blend The Berries:
- Throw raspberries in a blender and whizz until smooth. This pulls out all their bright flavor and color. If you've got frozen ones, no need to thaw them first.
- Get Rid Of Seeds:
- Push the berry mix through a fine strainer to catch all the seeds. This makes the filling silky and gets rid of any grittiness. Don't rush this part.
- Cook Down The Juice:
- Put the strained berry liquid on medium-low heat for 15-20 minutes until it thickens to about 1/4 cup. This packs in the flavor and stops your bars from getting soggy.
- Mix The Crust:
- Stir the dry stuff together then pour in melted butter to make a thick mix. It should look a bit crumbly but stick together when you grab a handful.
- Bake The Bottom:
- Push the dough down firmly into a paper-lined pan, making a small rim around the edges to hold the filling. Bake until it's just starting to turn golden.
- Whip Up The Filling:
- Mix sugar with cornstarch first to avoid lumps, then add eggs and finally the wet ingredients. It'll look really runny but will set up nicely as it bakes.
- Bake Again:
- Pour the filling onto the warm crust and put it back in the oven. Cook until it barely wobbles in the middle when you gently shake the pan.
- Let Them Set:
- Let everything cool on the counter before putting in the fridge for at least 2 hours. This slow cooling keeps them from cracking and makes the texture just right.
 Pin
Pin
I've found that taking your time with cooling these bars is crucial for the right texture. After many tries, I realized rushing this step means the filling doesn't set properly. Now I always make them the day before serving them to friends, and they actually taste even better after sitting overnight.
Keeping Them Fresh
These tangy treats will stay good in your fridge for up to 5 days if you keep them in something airtight. Want to save them longer? Wrap each square in plastic, put them in a freezer bag, and they'll last three months frozen. When you want to eat them, let them thaw in the fridge overnight instead of on the counter for the best texture.
Mix It Up
While raspberries shine in this recipe, feel free to try other berries too. Blackberries make a deeper purple filling with a slightly earthier taste. Strawberries work too but need more cooking down since they're juicier. For something totally different, swap the lemons for blood oranges during winter months - they'll give you a stunning red filling that goes perfectly with the raspberry flavor.
 Pin
Pin
Ways To Serve
These bars look great on their own, but for a fancy touch, sprinkle them with powdered sugar right before bringing them out. At dinner parties, I serve them cold with a small scoop of vanilla ice cream and a few fresh berries on top. They're also fantastic with a glass of bubbly or a cup of Earl Grey when friends come over for afternoon snacks.
FAQs About the Recipe
- → Can I use frozen raspberries instead of fresh?
You can totally use frozen berries. Just remember they'll need extra cooking time to thicken up because they're wetter than fresh ones.
- → How do I get clean slices for the bars?
For neat slices, make sure they're really cold first. Use a super sharp knife and wipe it off between cuts.
- → Can I use store-bought lemon juice?
Fresh-squeezed juice works way better. The bottled stuff often tastes too harsh and won't give you that sunny lemon flavor.
- → Can this recipe be halved?
You can definitely cut the recipe in half. Just use a smaller 8x8 pan and start checking if they're done a bit earlier.
- → How should I store these bars?
Keep them in the fridge in a sealed container for up to five days. They taste best when they're cold anyway!