
 Pin
Pin
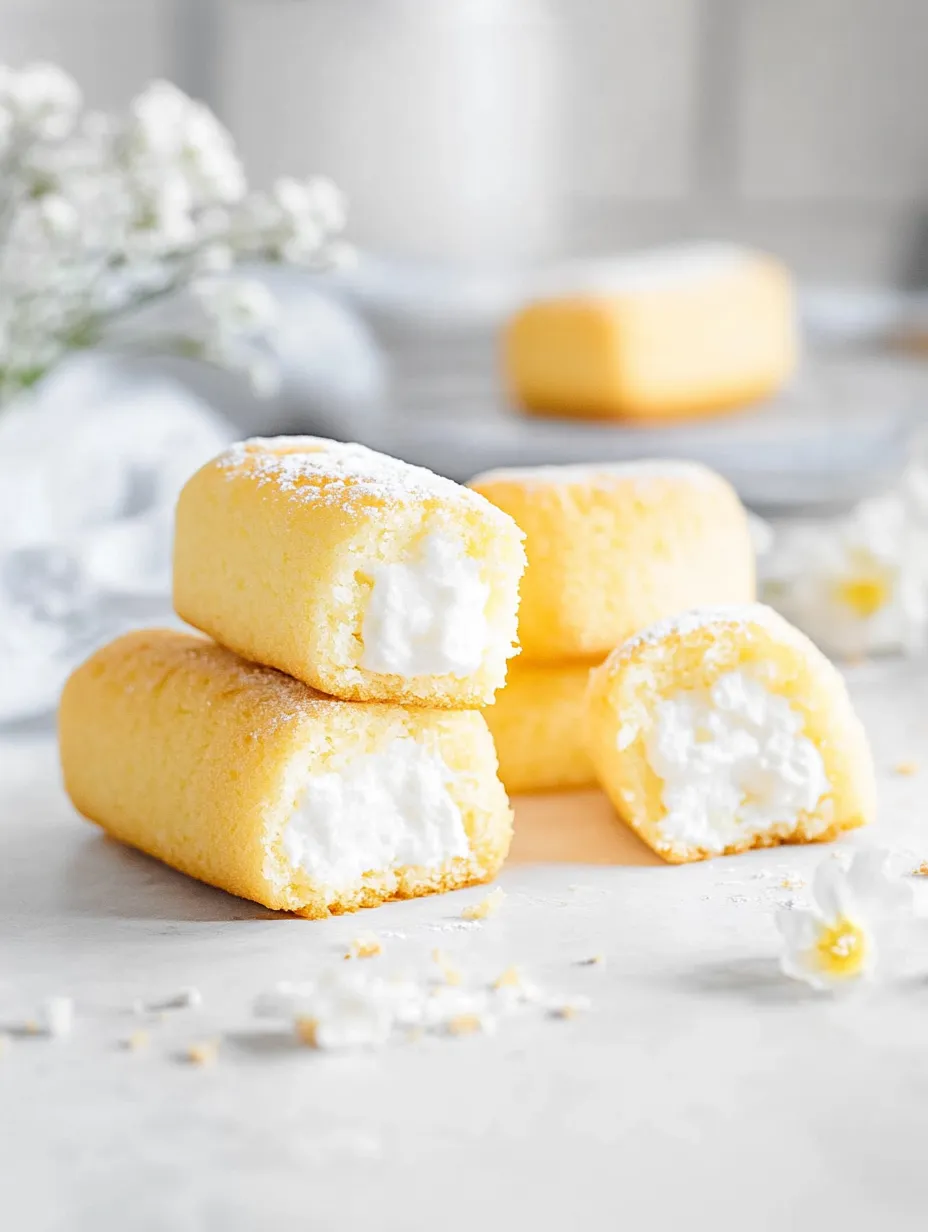
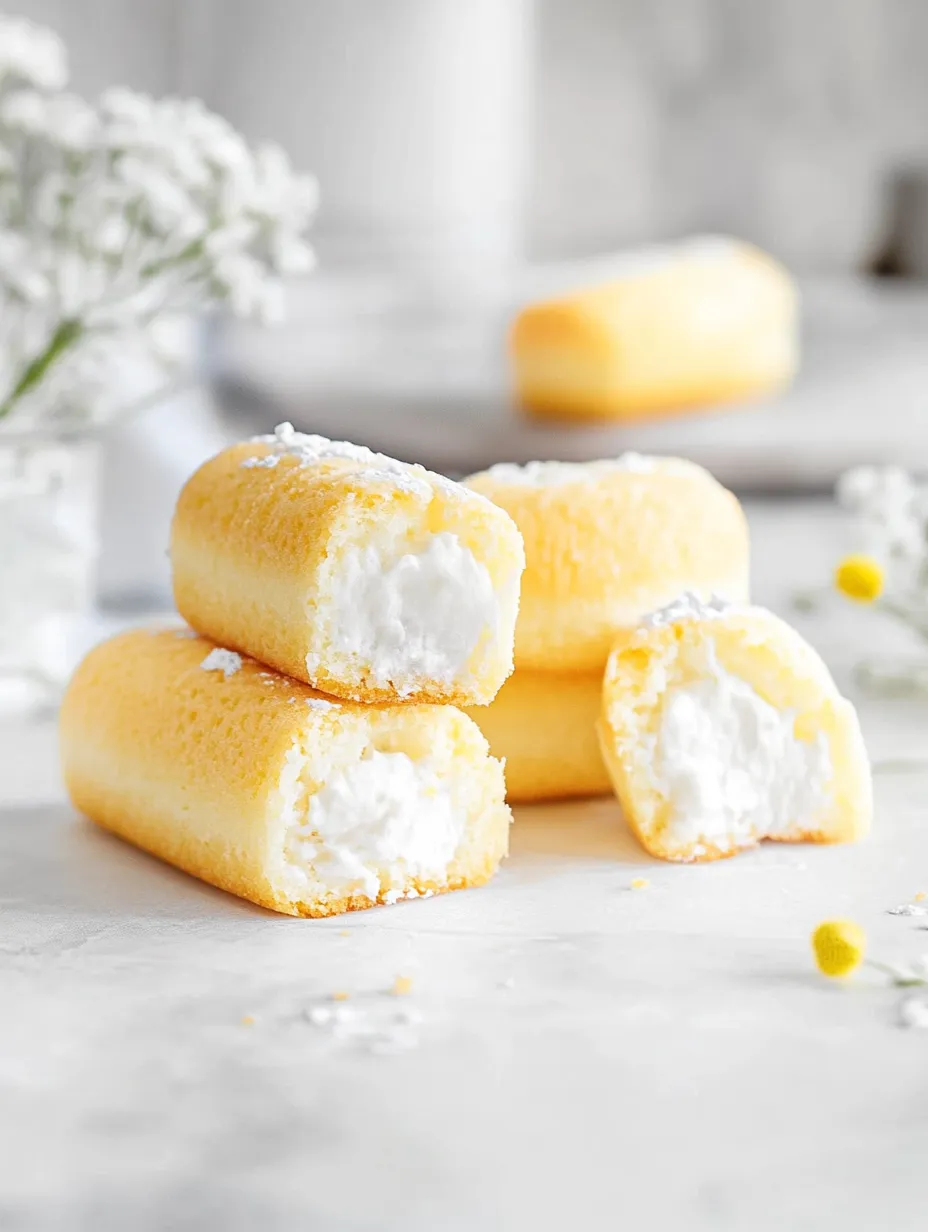
Baking up your own Twinkies at home takes you back to after-school snacks and lunchbox treats, but they’re way better fresh. The cakes come out crazy soft with that dreamy vanilla hit, and there’s nothing weird in the mix—just real stuff. These disappear fast at my house since that fluffy inside and mellow cake totally beat anything you can pick up at the store.
On a rainy weekend I took a shot at making these and my family nabbed every single one that same day. Now they’re always hinting for a batch anytime we have friends over or movie time.
Irresistible Ingredients
- Vanilla extract: packs that signature flavor, aim for the real deal for richness
- Vegetable oil: gives that moist, soft crumb—use something mild like canola
- Whole milk: keeps things smooth and rich, go for full fat
- Large eggs: lets the batter turn nice and velvety, room temp is best use farm eggs if you can
- Salt: sharpens flavor and counters too much sweetness, any fine kind works
- Baking powder: gives the cake its lift, fresh powder is key
- Granulated sugar: sweetens and helps structure, fine sugar works great for mixing
- Cake flour: gets you that feather-light crumb, sifted if you can, or mix regular flour and a bit of cornstarch
Stuff for the Filling
- Water: helps cook the syrup for the filling, filtered if your tap’s harsh
- Granulated sugar: helps the meringue stay big and sturdy, fine kind is best
- Egg whites: makes the fluffy, marshmallow-style middle, keep out all the yolk so it whips up right
Easy Step Guide
- Fill Each Cake
- Flip those cooled cakes upside down. Poke three holes with a skewer or your piping tip on the bottom of every one. Pipe the fluffy filling into each hole until the cakes feel awesome and stuffed.
- Prepare for Filling
- Scoop the cooled filling into a piping bag with a round tip (or just snip a corner off a plastic bag if that's easier).
- Combine Syrup and Whites
- Turn your mixer to high then slooowly pour the hot syrup into the beaten egg whites. Whip until totally cool—could take 5 or 10 minutes.
- Cook the Syrup
- Toss sugar and water in a small pot. Warm gently and stir until sugar’s melted, then boost the heat—don’t stir—until it hits about 246 to 250 degrees Fahrenheit.
- Make the Filling
- Beat egg whites on max speed so they form thick, shiny peaks. Not a bit of yolk, or it won’t work right!
- Cool Completely
- Let your cakes cool upside down on a rack after removing from pans. This keeps bottoms from getting soggy.
- Bake the Cakes
- Bake about 15-20 minutes in the oven you preheated. You want a toothpick to come out mostly clean with some crumbs.
- Fill the Pans
- Drop batter into the greased pans filling to about two-thirds. This makes room for them to puff up.
- Combine Batter
- Gently whisk the wet mix into the dry until it’s totally smooth and lump-free. Sifted flour helps things blend easy.
- Mix the Wet Ingredients
- Break the eggs into a bowl, add milk, oil, and vanilla and whisk it all up so it’s completely together.
- Mix the Dry Ingredients
- Put flour, sugar, baking powder, and salt in a big bowl and whisk to spread everything around.
- Prepare the Pans
- Spray your pans (either Twinkie shapes or mini loaf pans) really well so nothing sticks, then set aside.
- Heat the Oven
- Start off by putting your oven at 350°F (177°C) so you get an even bake.
 Pin
Pin
Honestly, seeing the look on someone’s face when they bite a homemade Twinkie is unbeatable. Filling them is my favorite part—when the marshmallow goes in and the cake gets super plush. My sister always wanted hers with double filling, so it kind of became one of our family’s weird little traditions.
Storage Advice
Keep your filled cakes sealed up at room temp for a couple days. For stretching the shelf life, stash them in the fridge for up to five days—just let them warm up before eating. They freeze like a dream too: wrap each piece in plastic and foil, then let thaw on the counter when you want one.
Swap Options
Out of cake flour? No stress, just use regular flour with a spoonful of cornstarch so it stays light. Don’t feel like whipping meringue? Store-bought marshmallow fluff will do, even if it’s not quite the same. And you can swap any gentle oil or even melted coconut oil for the cake part—just use an equal amount.
 Pin
Pin
Serving Ideas
Shake on some powdered sugar or zigzag a little melted chocolate on top. They’re awesome tucked into lunchboxes for a fun surprise or slice in half and stack with berries and whipped cream for a dessert kids go nuts for. Wrap one up and hand it off with a cute tag—best edible present ever.
Fun Snack Origins
This cake got started back in the 1930s in the US and was first filled with banana cream. When bananas were hard to get, they swapped to vanilla—and it stuck. Making your own lets you bring a little kitchen magic to snack time and everyone always knows the shape and taste with your own homemade spin.
FAQs About the Recipe
- → Is there a swap for cake flour?
For a quick fix, mix 2 cups of all-purpose flour, scoop out 4 tablespoons, replace with 4 tablespoons of cornstarch, and sift it really well.
- → How do I make the filling extra fluffy?
Start by getting your egg whites stiff, then pour in hot sugar syrup as you whip. That makes the filling super airy and stable.
- → How do I check if the cakes are done?
Bake at 350°F around 15–20 minutes. Stick in a toothpick—if it comes out clean and the cake springs back, you’re all set.
- → Can I grab premade filling?
If you’re in a rush, marshmallow fluff from the store is a total win—super close in flavor and texture to a homemade filling.
- → The easiest way to add the filling?
Fill a piping bag with cream and poke three tiny holes in the bottom of your cooled cakes. Pipe the filling in so it’s even all around.
- → Why should I sift flour for these cakes?
Sifting knocks out lumps so your batter blends smoothly. It helps get that delicate and tender crumb everyone loves.