
 Pin
Pin
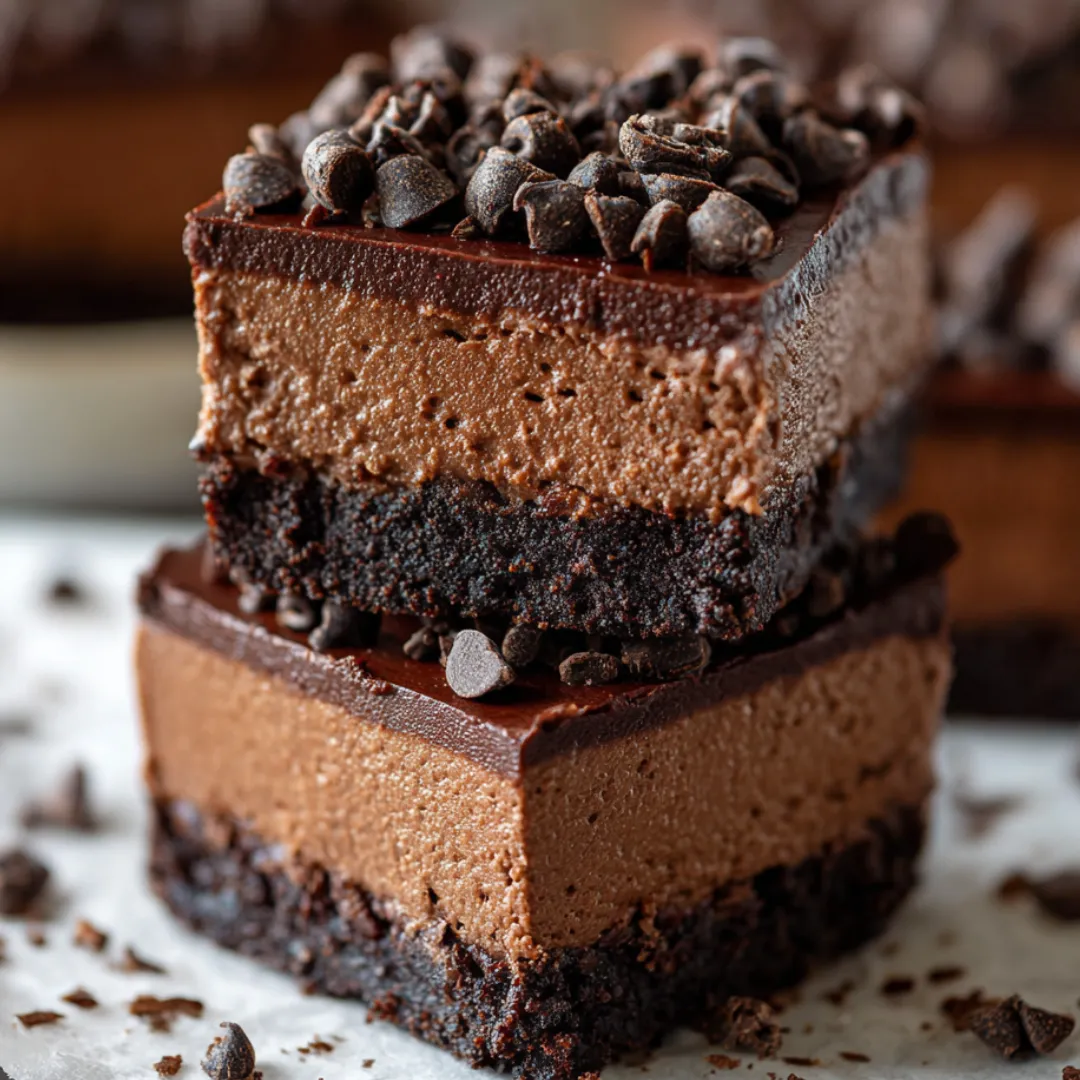
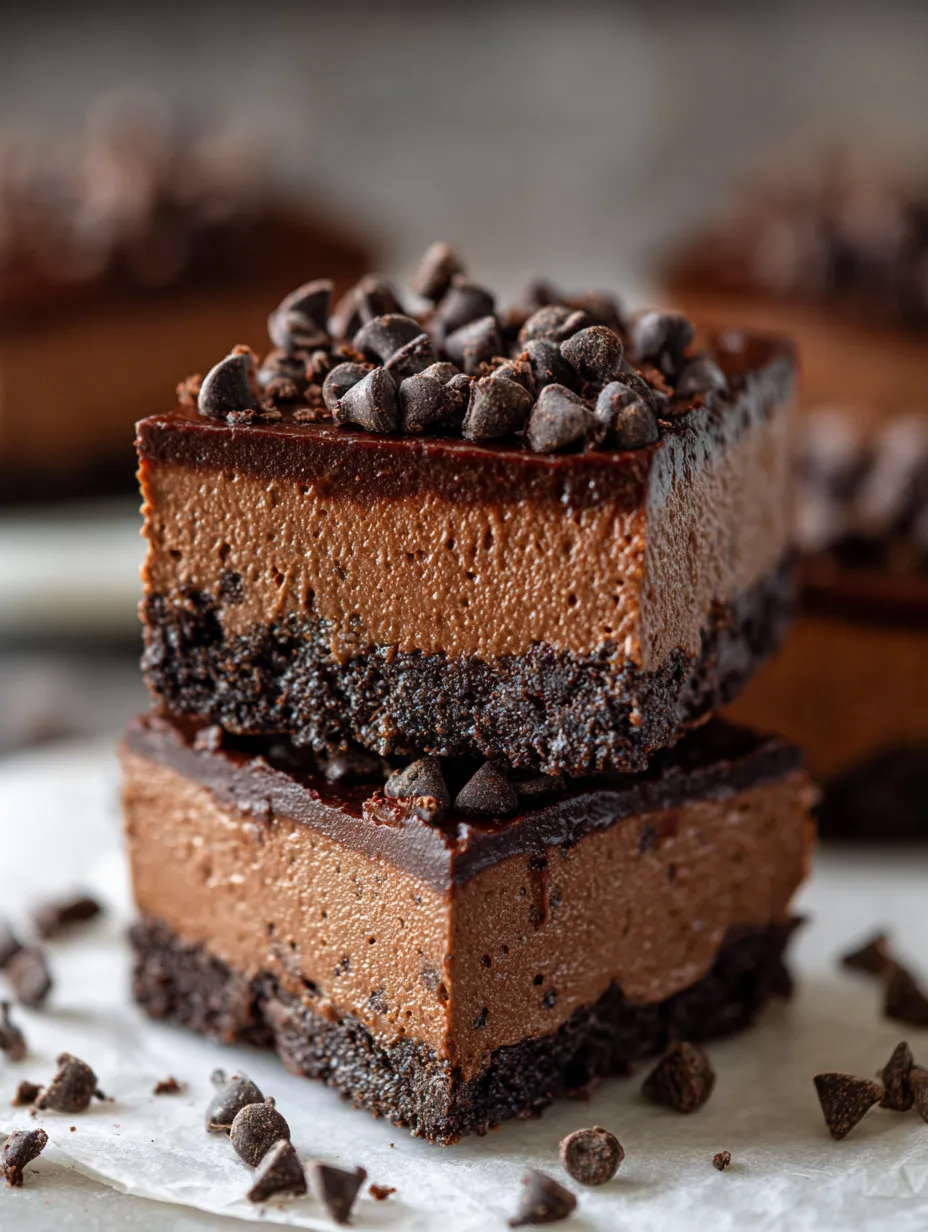
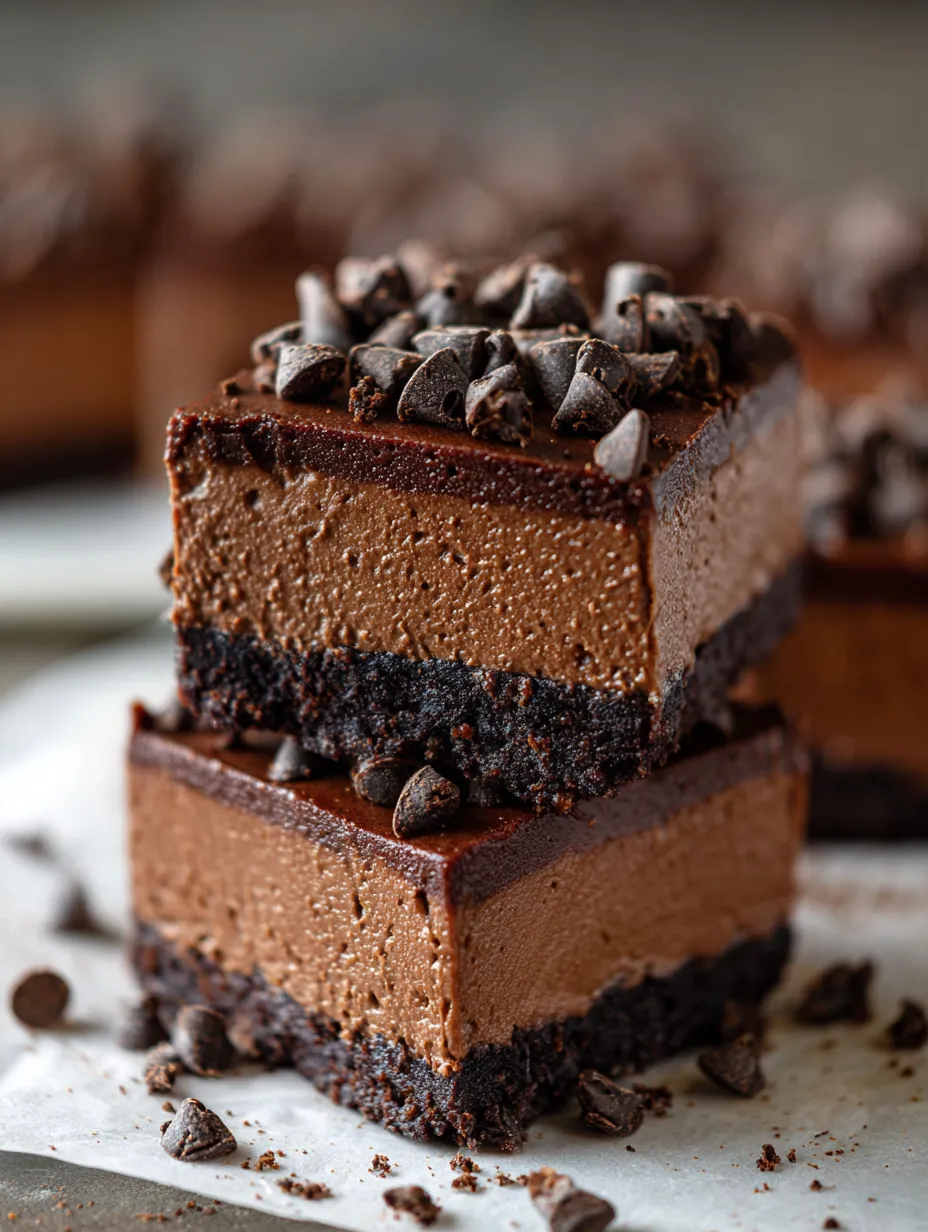
These No Bake Death By Chocolate Cheesecake Bars are what chocolate fans go crazy for. You’ve got a dreamy, creamy middle and a chocolate cookie base with a nice snap and there’s no need to touch the oven. Want to wow guests or give into major chocolate cravings? Grab this dessert. I can’t stop making them for parties or family hangouts—they’re always gone in a flash.
The first time I brought these to girls’ night, they vanished before the movie ended. That’s when I knew this is always a hit—now I bring these whenever something sweet is needed fast!
Decadent Ingredients
- Mini semi-sweet chocolate chips: They go on top to add a fun crunch—grab whichever brand you love
- Salt: Seriously boosts the taste—don’t forget it if you want punchy chocolate flavor
- Baileys Irish Cream or Kahlua: Totally optional, but gives a boozy kick—try either or skip for classic chocolate
- Heavy whipping cream: Softens the filling and makes it extra rich and fluffy—just make sure it’s fresh
- Cream cheese: Gives the cheesecake that dense, creamy bite—brick style is best for the texture
- Dark chocolate: Packs the filling with deep chocolate notes—pick your favorite bar for melting
- Unsalted butter: Gives the crust that melt-in-your-mouth touch—better butter, better flavor
- Oreo cookies: Use for the base—go with the classic chocolate ones and skip any broken cookies for best results
Simple Directions
- Ready To Serve:
- Grab the foil handles and pop the whole block out. Slice into squares. For cleaner slices, wipe your knife after each cut.
- Chill Down:
- Let it sit uncovered in the fridge at least three hours so it’s set and flavors come together. Afterward, cover with foil until it’s time to slice.
- Build Your Bars:
- Spread out the cheesecake-chocolate mix across that crust. Scatter chocolate chips all over the top.
- Add The Extras:
- If you’re using Baileys or Kahlua, mix them in now. Sprinkle in the salt and taste in case you want a touch more.
- Mix It All Up:
- Dump your chocolate-cream blend into your whipped cream cheese. Beat it until it’s thick and super silky. Really go for smooth here.
- Melt That Chocolate:
- Chop chocolate. Heat it and the cream together in a bowl in the microwave, zapping for thirty seconds at a time and stirring. Ninety seconds is usually enough. Don’t rush; it burns fast.
- Whip The Cheese:
- Beat cream cheese till it’s fluffy using high speed on a handheld mixer. This gets your filling super smooth.
- Work The Crust Magic:
- Melt the butter with a bit of your chocolate in the microwave. Mix that into cookie crumbs and pulse till everything sticks together and’s shiny. Press the mixture into the lined pan and pack it down hard—edges too. Crust needs to be firm so bars stay together.
- Blast The Cookies:
- Toss whole Oreos into your food processor. Whizz them until they’re sandy and fine. Set aside.
- Pan Prep:
- Line a 9-inch square pan with foil—leave ends hanging so it lifts out later. Mist with cooking spray for easy release.
 Pin
Pin
You don’t expect that crunch from the mini chips, but it’s awesome. Once saw my kid make a trail of chocolate chips with the topping before dinner. These bars make every chocolate moment a little more fun.
Storing Made Easy
Cover them up once they’re set and chill in the fridge—they’ll stay just right for at least ten days. Want to freeze? Wrap each bar in plastic then foil. Thaw them overnight in the fridge for best texture.
Swaps & Shortcuts
Use any brand of chocolate sandwich cookie or try the double chocolate flavor for a boost. For a milder taste, swap in milk chocolate for the dark. If you don’t want the booze, just leave out Baileys or Kahlua or use a splash of strong coffee to get a similar kick.
 Pin
Pin
Best Ways To Serve
Go tiny with your slices—they’re so rich that small squares are just right for a summer cookout or birthday bash. Add a spoonful of whipped cream and dust of cocoa powder if you want to fancy them up.
Fun Backstory
No bake bars showed up big in North America—they’re super quick, look impressive, and save your kitchen from the heat or crowded ovens during gatherings. Classic, layered desserts like this have turned into staples for parties everywhere.
FAQs About the Recipe
- → Could I use milk chocolate if I don’t have dark?
Sure thing! Use milk chocolate for a sweeter vibe. Just know it won’t taste quite as deep and rich.
- → No food processor for the crust—what now?
Pop your cookies into a big zip-top bag, smash them with a rolling pin till they’re little crumbs, and then mix them up with your butter.
- → Do I really need Baileys or Kahlua?
Nope! Skip the booze if you want. These bars don’t miss a beat without it, but adding some can punch up the flavor.
- → How early can I whip these bars up?
You can stash them in your fridge for around 10 days, so feel free to make them way ahead of time for your crowd.
- → Will these bars freeze okay?
Absolutely! Just seal them tight and freeze for up to a month. Let them thaw in the fridge overnight before serving.